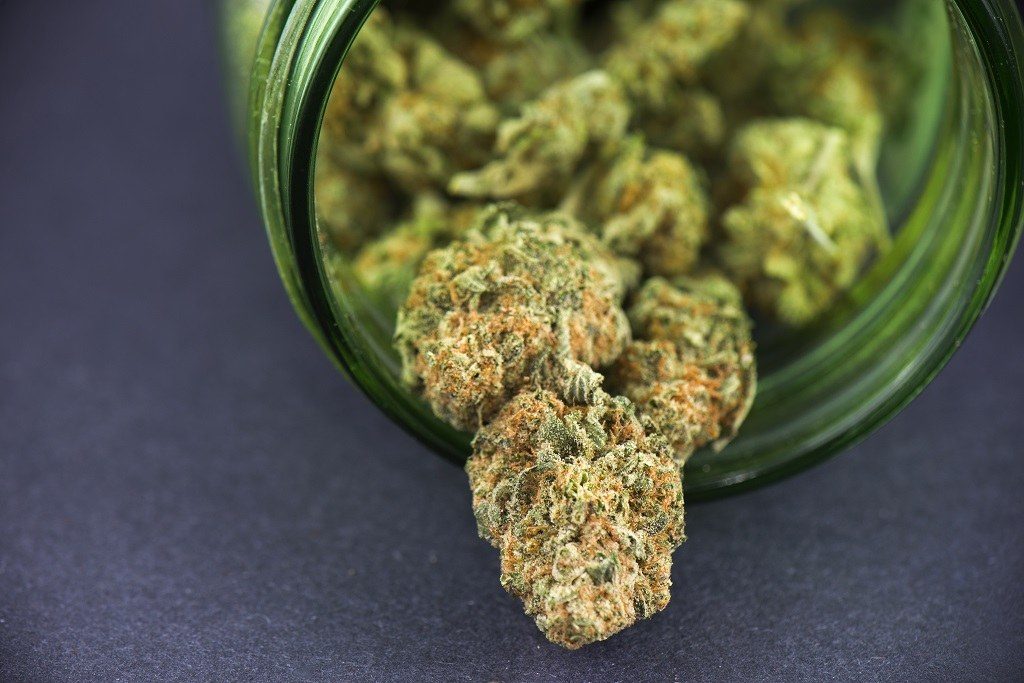
After going through all the growth stages and harvesting of your marijuana plants, you will notice that the weed does not look anything like what you or other people smoke. To achieve this status, you still have to put your weed through other very important stages. The stages are Drying and Curing Your Marijuana Buds we will first start with Drying Your Weed and why it is important to do so. The main key to note is that during this stage, you have to be very keen in drying and storing your weed otherwise, you will have a low potency product. The place you choose for the drying process will be of the utmost importance. Before we go to that, let us answer one of the most frequently asked questions. What is the importance of drying the weed?
[amazon bestseller=”herb drying racks”]
Why you should dry your weed
The weed production of cannabinoids stops after the point of HARVESTING the crop. Resins stop forming and potency of the crop decreases from then onwards. By drying the weed, you slow down these effects, which in turn allow your weed to maintain its potency and effectiveness. Dry weed burns more efficiently and better which makes it great to smoke. The drying process makes all the water in the weed evaporate leaving it dry and easier to burn. Weed that is not dry does not give you any high and it has an unpleasant taste. One of the reasons it tastes bitter is because it has chlorophyll.
Though some people smoke their weed before it dries probably because they do not have the patience to wait, it is not the best thing to do. Drying turns the plant chlorophyll into sugar, which in turns changes the bitter taste to the normal good taste of cannabis. At this stage, THC could be present but it is not active. The drying process requires patience and considering that you have put your crop through all the other stages, a few more days will not make any difference. after all the drying process is the one that triggers the cannabinoids and you would not want to skip this process because it is very crucial for determining the potency of your weed.
The drying process
Now that you know that drying your weed reduces moisture, breaks down the chlorophyll, increases its potency, optimizes its cannabinoid profile and improves the smell and taste, it is time to go through all the drying steps to take. The first most important thing is to avoid the most common mistakes many people do when drying their weed. Some people want to do it very fast so that they can reap their hard work just as fast. As I said up there, drying requires patience and rushing the process may leave you with a poor quality product. The process may be slow and tedious but is worth the wait. The drying and curing process takes an average of 8 weeks though you can choose to keep your weed for a longer time in the curing stage.
Drying space
The first thing to take of is your drying space. Besides making sure that the place is clean, you should also ensure that it is dark so as to get rid of the chlorophyll. Do not use items such as microwaves, ovens or heat fans to dry your marijuana, as they will leave your product with a harsh taste because of drying too fast. . The optimal temperature of the room should not exceed 21C with a HUMIDITY of 50%. For the first seven days, you should allow your weed to dry slowly while at the same time protecting them from mold and bacteria.
[amazon box=”B004MS4L5G”]
Drying methods
Growers use different methods to dry their weed. Whichever method you choose to go with the most important thing is to master the art of drying without rushing the process. Delaying the process too much is also not an alternative as it can leave your weed with low potency. Below are some of the most common drying methods.
Cage Drying
Drying marijuana in wire cages is a common practice as they are mobile and self-supporting. You can also move your weed easily when it is in the cages to acquire the best drying positions and the best places with enough airflow. The cage, made from gauge welding wire that connects on all corners to form a cage is ideal for weed that is two to twelve inches long. The advantage of using the cages is that you can easily continue trimming your weed as it continues to dry. You can also choose to suspend the cages from the ceiling if you want to create space in your drying room or if you are drying large amounts of marijuana.
[amazon box=”B074SW9ZML”]
Screen Drying
For this drying method, you need screens made out of glass panes into boxes. You can make a rack to support the glass screen that will hold the box and your weed in place. The main advantage of using screen drying is that they allow air to flow to your weed form all directions, which enables the weed to dry evenly. The method is better suited for small size and amounts of buds that do not hang easily. To dry your buds even better using screen drying, you can use racks as slides to maximize space and give room for drying lager quantities of weed.
Pressing Method
Pressing marijuana is one of the oldest drying methods in the market. The method targets nuggets of weed that are bushy. Before using the method, first air-dry the buds for a week and then press them gently to get rid of any moisture. To carry out this process effectively, take a small amount of the moist cannabis and place it in a plastic bag. The bag should be clear so that you can see the results. While gently squeezing the weed, roll the plastic bag on a smooth surface or on your palms. After that, take the bag and place it under a pillow allowing it to rest there or a few hours. If you want better results, press the weed many times to make the buds more compact. After the few hours are over, take the bag from under the pillow, remove the pressed buds, separate them and allow them to go through the last phases of drying. Repeat this sane process after every two days until you are satisfied with the look and feel of the weed. Once fully dried, place the dry buds in airtight containers for the curing process.
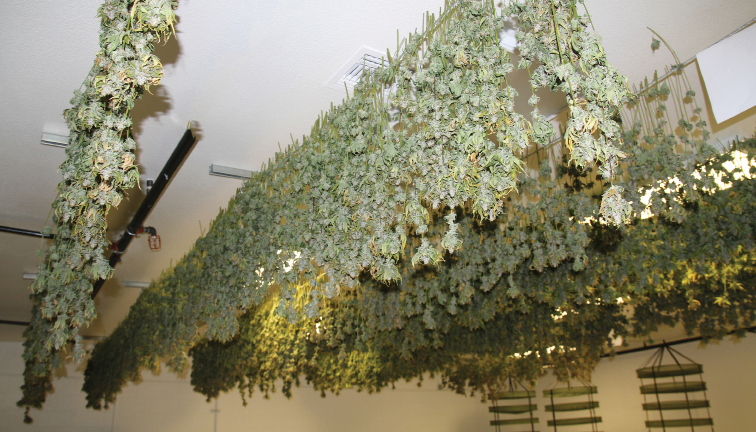
Drying Lines
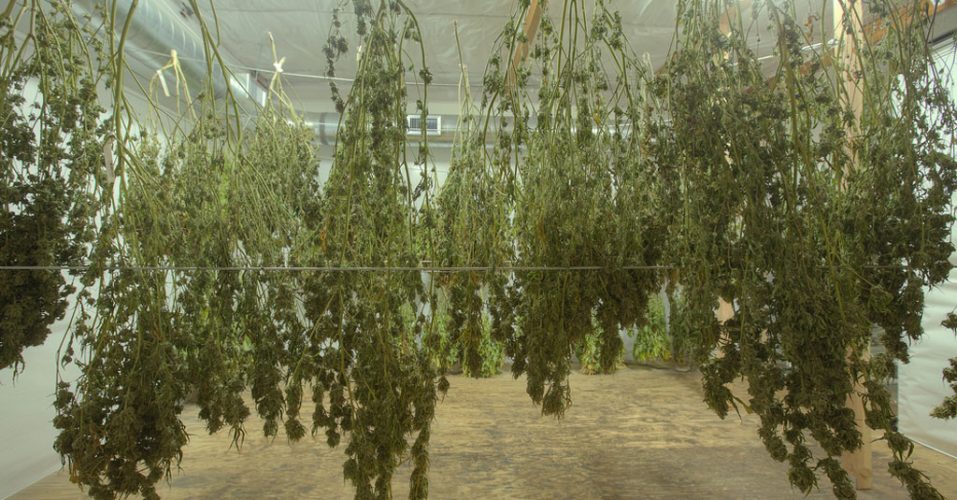
This is another popular drying method and it is ideal for those that want to maximize the weed potency. For this method, you can choose wire lines or ropes to hang your entire weed stash. Hanging the buds on the drying lines allows moisture from the stems to go to the buds, which slows down the drying phase. This slower drying helps to give the buds a smoother taste. Before hanging the buds, make sure you remove all the excess leaves to allow the buds to receive enough airflow as they hang to dry. Removing the excess leaves also helps to decrease the humidity in the drying room and to prevent the chances of mold growth on the buds.
Drying Fans
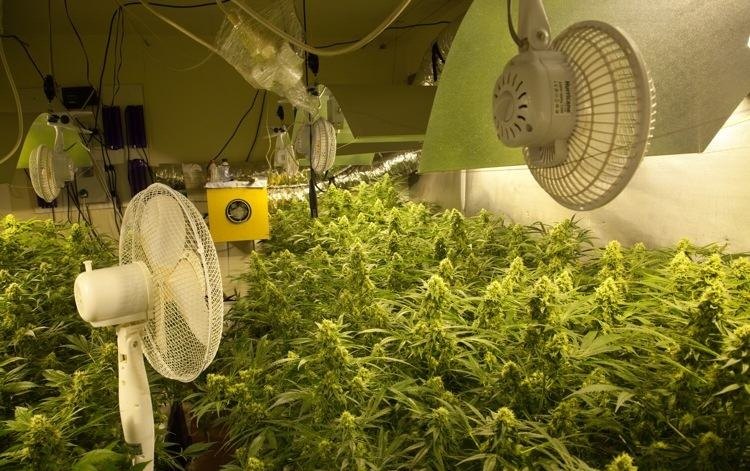
Another method of drying the buds is by using drying fans. Though it is advisable not to dry your weed using heaters so as not to affect the quality and potency of the weed, air circulation is very important for the drying buds. Good air circulation helps to speed up the process while at the same time preventing any chances of mold growth. It is okay to use a drying fan but you should not blast it directly onto the buds. If you decide to use any fans in the room, make sure their work is to move the air inside the room but not to get into direct contact with the drying marijuana. Some of the best drying fans to use for drying weed are the oscillating fans. These fans come in handy especially if the crops still have left over leaves or if they have unseparated buds. The fans help to circulate air to all the hidden areas reducing the chances of mold growth.
[su_note note_color=”#f1fcdb” text_color=”#0d100c;”]Best Inline Fans For Cannabis Grow Rooms : Grow Room Ventilation[/su_note]
Dehumidifiers
A dehumidifier comes in handy when you are drying your weed as it helps to lower humidity levels in the room. The dehumidifier does not only remove moisture from the air bur it also removes it from the plans as well. This helps in controlling the rate at which you want your weed to dry. The best level to set the dehumidifier at is 35% and with this, you can expect good results with a highly potent product. Below is an example of a good dehumidifier.
Product Review
Dry Packs 750-Gram Silica Gel Canister Dehumidifier
[amazon box=”B003QZ6PZ0″ grid=”1″]
The above dehumidifier is one of the best to use in your drying room for your weed. it contains a large volume of 750 grams of silica gel. The constriction off the canister is sturdy, and it is easily portable. It is also electric but does not come with the hustle of cables and cords. The reason why it is a favorite for many weed growers is that it is easy to reactivate as it uses an indicator showing the level of the silica gel. The indicating beads turn from orange to dark when the silica gel absorbs about 60% of the moisture. The canister is long lasting and you can use for many years of your weed growing period.
Space Heaters
Earlier on we mentioned that drying weed too quickly kills its potency and though it may seem contradictory that we are saying you can use space heaters for drying, it is all for a good reason. For the weed to dry properly, the humidity in the drying room needs to be low. With the air being cold, there will be less likelihood of moisture in the air. Though weed also needs less moisture, when there is very low moisture in the air, the weed may not dry properly. It is okay to warm up the drying room in order to make the surrounding air hold more evaporated water. By placing a space heater in one corner of the room, the humidity in the room will come down and the moisture from the plants will disappear into the air allowing the buds to dry up faster and efficiently.
[amazon box=”B006JV24IU” grid=”1″]
[su_note note_color=”#f1fcdb” text_color=”#0d100c;”]Best Heaters for Cannabis Grow Room[/su_note]
What procedure do outdoor weed growers use to dry their weed?
The above drying process is for indoor weed growers. Those that grow their weed outdoors need more creativity when it comes to drying their crop. Because of conditions such as climate changes, outdoor growers have no other option but to cut down their weed and take it indoors for the drying process. Just like the indoor grown weed, outdoor grown weed also needs to follow the same drying process in a room with good ventilation with no exposure to anything from the outside. Before setting the buds to dry, the crop has to go through the same procedure of removing the unnecessary leaves to allow even drying.
How dry should the weed be?
After following your preferred drying procedure, the next step is to know whether your weed is dry enough to go to the curing stage. There is however the question of how dry your weed should be. Even though we have said that the main reason for drying the buds is to rid them of moisture, they still retain a small percentage of the same. This however does not exceed 10% of the total moisture the buds had before the drying process. The little moisture percentage helps to prevent crumbling and burning up too fast when smoking the weed. A 10% moisture means the marijuana is still dry enough to light up properly and not burn too fast. The small percentage cannot cause any mold growth on the buds. It is not possible to know the exact content of moisture in the weed but a short test can help you to determine if your weed is ideal for the range you are looking for. Below are ways to check if your cannabis is dry.
- Take the marijuana bud between your fingers and gently squeeze it. If the bud crumbles or breaks apart, then you know you over dried it.
- Take the stem of the bud and slightly bend it. If it gives a snap sound, then it means that you dried it well right to its stem. If the stem bends without snapping, then it means that the moisture levels are still high and you need to keep it in the dry room for a few more days.
- The perfect dryness is when you bend the stem, it snaps, and when the buds do not break or crumble between the fingers.
- When you have reached the expected days of drying the buds, take a small piece every day to check for the dryness using these simple tests. If you feel the buds are still moist, place them back and check on them every day until you are satisfied. If you keep them without checking on them daily, you may end up with over dry buds.
Monitoring the drying process
It is very important to monitor the whole process keenly from the first week of drying your weed crops regardless of the method you use. The moisture content in your final product can do or break you and this is one of the reasons why close monitoring is crucial. The first week of drying is the most important period. Some stems start becoming dry and brittle in just two days. If you notice this, then you should realize that the method you are using is drying the weed too fast.
Early monitoring allows you to have adequate time to make the necessary adjustments to the method you are using in order to save the buds. even after the first week is over continue with the monitoring until you are sure allow your buds are dry and ready for the next stage. Remember that if the buds are not well cured, then the next stage will not save your end product. This is the most crucial stage of your weed. After you are sure that everything is in order, you can now sit back, relax, and enjoy the hard work. Some people even try to take a smoke after this process and even without curing the weed; they can tell if their product is good or not good.
Wrapping it up
With the above guidelines, it is my hope that you will achieve the best results from drying your crops. All you need to remember are the drying conditions and the importance of keeping your crops free form moisture or exposure to too much light. Whichever method you decide to use, whether you are new into weed growing or you are a professional, you have to make sure that before taking your product to the curing stage, you already have the kind of potency you need form the buds
We also hope that this article was of help to you and you will not hesitate to share it. If you have any questions or any comments, contact us and we will get back you.
Read How to Grow Cannabis Series:
[su_note note_color=”#f1fcdb” text_color=”#0d100c;”]Chapter 1-> : How to Grow Cannabis[/su_note]
[su_note note_color=”#f1fcdb” text_color=”#0d100c;”]Chapter 2-> : Best Marijuana Strains[/su_note]
[su_note note_color=”#f1fcdb” text_color=”#0d100c;”]Chapter 3-> : How To Germinate Marijuana Seeds [/su_note]
[su_note note_color=”#f1fcdb” text_color=”#0d100c;”]Chapter 4-> : How To Clone Weed[/su_note]
[su_note note_color=”#f1fcdb” text_color=”#0d100c;”]Chapter 5-> : Best Vegetation Stage (Vegging) Tips for Marijuana[/su_note]
[su_note note_color=”#f1fcdb” text_color=”#0d100c;”]Chapter 6-> : Best Flowering Stage Tips for Cannabis [/su_note]
[su_note note_color=”#f1fcdb” text_color=”#0d100c;”]Chapter 7-> : Timeline of the Cannabis Flowering Stage[/su_note]
[su_note note_color=”#f1fcdb” text_color=”#0d100c;”]Chapter 8-> : When To Harvest Weed[/su_note]
[su_note note_color=”#f1fcdb” text_color=”#0d100c;”]Chapter 9-> : Drying Your Marijuana Buds [/su_note]
[su_note note_color=”#f1fcdb” text_color=”#0d100c;”]Chapter 10-> : How to Cure Weed [/su_note]
[su_note note_color=”#f1fcdb” text_color=”#0d100c;”]Chapter 11-> : How To Store Weed [/su_note]
More from my site

![Purple Kush [PK] Marijuana Strain Review & Info](https://101growlights.com/wp-content/uploads/2019/11/Purple-Kush-weed-strain-150x150.jpeg)