After going through all the stages of weed growing starting from the GERMINATION phase to HARVESTING, you can now look back at the whole cycle and give yourself a pat on the back for giving your weed the love, care and attention it needed. You are however not through with the cycle because you still have to continue with the same tender love as you dry your weed. DRYING WEED though tedious and slow, prepares your weed for the final phase, which is the curing stage. There are many different ways to cure your weed and some people do it fast in order to enjoy the benefits.
It is possible to cure your weed quickly but the method you use to do so is much more important than the speed at which you want your weed to dry. The methods used vary from grower to grower depending on what they want their final product to taste like. In this article, we take you through the different ways you can cure your weed as we also highlight the benefits and disadvantages of the methods.
Some tool you need for curing weed:
[amazon bestseller=”Curing Jars”]
What is the purpose of curing weed?
One of the many questions people especially those growing the crop for the first time ask is if curing cannabis is necessary. Some feel that after proper drying, weed is good enough to offer its purposes. Below are the reasons to make you understand why curing is necessary.
Curing increases the weed potency
The main reason for growing cannabis is to get THC, CBD and CBN. The plants produce different levels of the three throughout their growth, which transform with time. As the plant grows, it goes through biosynthesis, which converts tetrahydrcannabinolic acid to THC. Even after you harvest the crops, biosynthesis continues. For this to happen though, you have to handle your plants well and keep them within the right temperature ranges. Drying the buds has a huge effect on how much potency the THC is. Quick drying may reduce the potency and you end up with low quality weed. Curing saves the weed potency. After drying, you should continue keeping your dried buds away from light irrespective of the method you use.
Curing improves the taste, smoothness and flavor f the weed
If you take weed that is not dry or cured properly, it may have a bitter taste. The flavor may also not feel like the natural weed flavor. Weed gets its flavor from terpenes, produced naturally by the plants. Terpenes are very volatile compounds and can degrade very fast or evaporate into ether if they get warm. If you keep your weed in a room with temperatures that are above 700F, they will start to break down. It is therefore very important to keep your harvested buds at between 60 and 70 degrees and cure them slowly. Curing the weed slowly brings out the smells and flavors better as compared to fast curing. This is because slow cutting ensures that bacteria and enzymes from unwanted sugars break down. This also helps to improve the smoothness of the weed preventing the burning feeling in the throat that comes with bad weed.
Curing helps to preserve the weed
If you use good curing techniques, you can keep your weed for as long as you want. This is so especially if you are not growing for commercial purposes but for your own use. It is almost impossible to smoke several buds in a day but if you cure the weed properly, you can keep it for as long as you want and smoke it slowly at your phase without the fear of any degradation-taking place. Curing properly also means that you will not have o worry about things like mold and mildew r he buds losing their cannabinoids. All you need to do is make sure your buds are in a dark and cool location in airtight containers. If you do this, you can use your weed comfortably for the next two years. Just like wine, weed connoisseurs will tell you that weed tastes better with age.
Tip
Do not ever store the buds in a freezer or fridge. Doing this will change the trichomes and make them brittle which in turn leads to their easy break offs. Do not place the weed anywhere near anything that emits heat such as electronics and other home appliances. When storing the cured buds, always use glass vacuum-sealed jars with neutral charges.
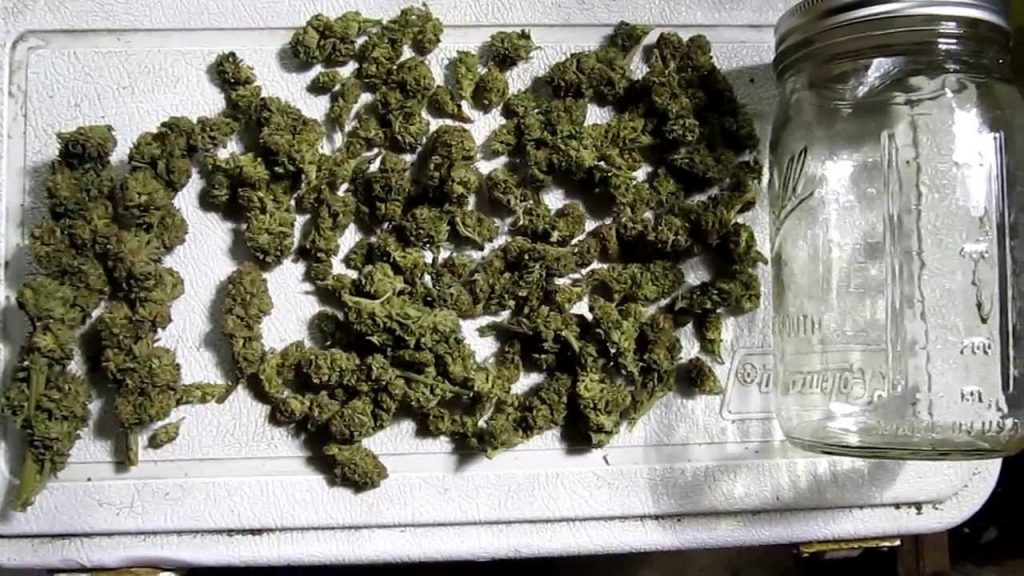
Preparing the buds for curing
Before you cure the buds, you must make sure that they are dry and trimmed well. You can either wet trim or dry trim the buds. If you choose to go with wet trimming, you must make sure that the buds are free from any excess matter. If you trim off any sugar leaves, do not throw them away as you can use them to make oil and edibles. Wet trimming requires the spreading of the buds on an aerated large surface area. You can use a mesh drying rack for this, as it will give you the best results. Using anything without good aeration such as cardboard or plastic may lead to the development of mold.
Make sure you do not over fill the rack because resin is also a favorite breeding space for bacteria. Dry trimming is the more popular of the two methods and it involves the cutting of branches to a length of 10 to 15 inches. The method is especially good if you have large amounts of buds to trim though it is not favorable for small sugar leaves as they are harder to trim. Trim the buds once you are sure they are completely dry. Whichever method you decide to use, make sure that the process takes place in a dark space with temperatures ranging between 60 and 70 degrees F.
Humidity levels should also be between 45 to 55%. You can use a DEHUMIDIFIER to control he humidity levels and a fan to help with proper circulation of air. Once you test he dryness of the buds and they snap easily while looking crunchy on the outside, then you can be sure that they are ready for curing. The drying period will take anything between 5 to 15 days. Monitoring the buds throughout this period is very important.
Curing methods
Once you are sure that the drying process was a success, you can now cure your buds. Below are some of the most popular curing methods.
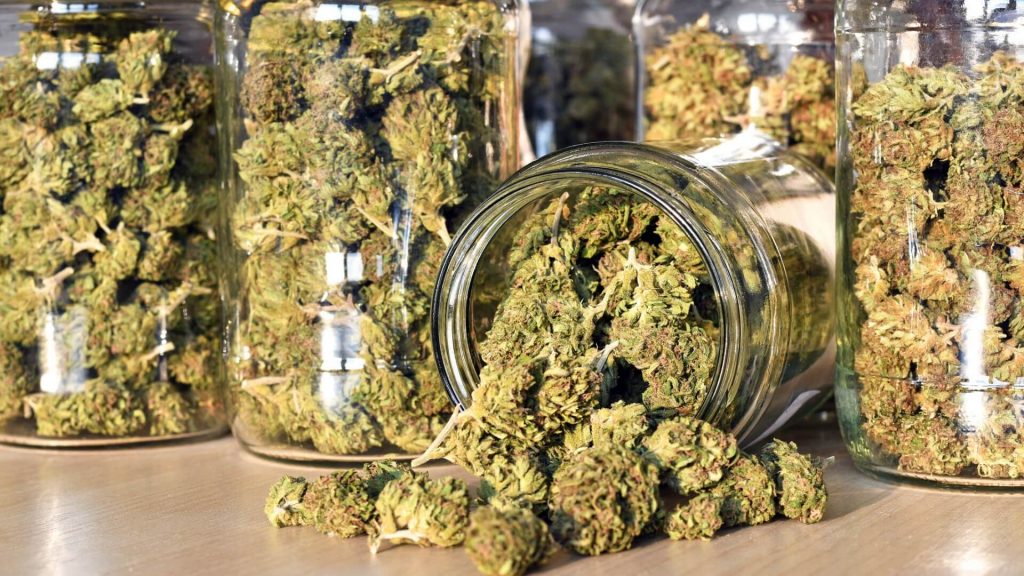
Jar curing
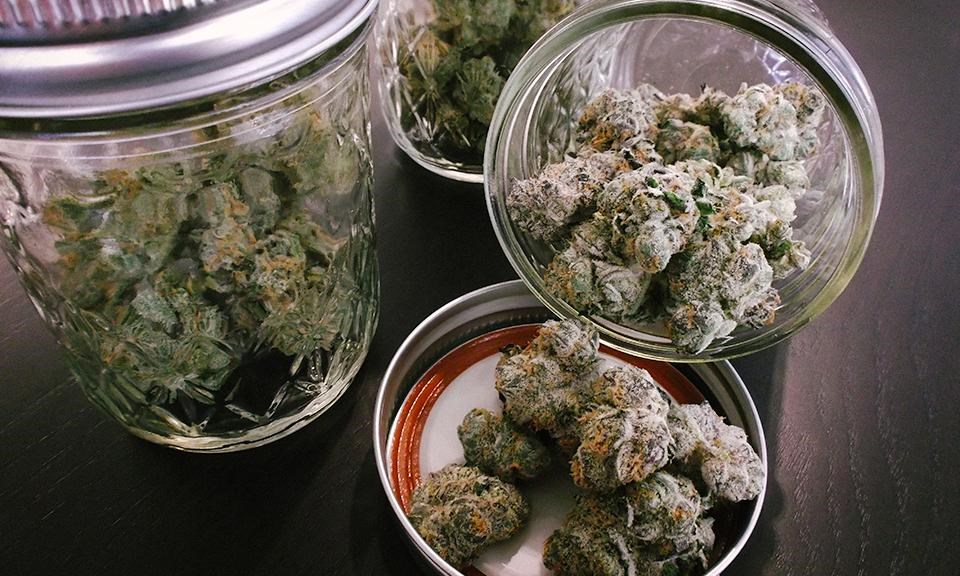
This is the easiest weed curing method, as it does not require too much equipment. It is also one of the cheapest and even novices can cure their buds using this method without any fuss. All you need are a few airtight jars. You can use kilner jars or recycled jam jars. The most important thing to note is that they should have tight seals and they should be spotless clean. Sanitize the jars before using them. After you are sure the jars are ready, make the buds and fill each jar to around 2/3rds full. Place the lid back on but do not clamp it down too tightly. Store the jars in a cool dry and dark place.
This is the early curing stage and it is important to give your buds some air in order to add their THC potency. Giving them air also helps to break down the sugars, which give the weed a smooth taste and good flavor. What you do to ensure that the buds get enough air is open the jars at least two times daily for the first week. You should leave the jar open for just a few minutes to let in air and allow it to circulate. While you are at it, also check the buds for any mold and mildew growth. You can do this by taking the buds out of the jar, checking them through before returning them to the jar to continue with the curing process. After two to three weeks, your buds will be ready to smoke or sell.
If you want a better taste and more THC potency, you can extend their curing time for another few weeks or months depending on what you are looking for. Always make sure that you put your buds in a different position from the one they were at when returning them back to the jars. This helps in curing all of the evenly.
Product Review:
Rocking Gear Mason Jar
[amazon box=”B079V1J9XY” grid=”1″]
The double-layered 2.5-ounce Mason jar from rocking gear is one of the best curing jars to use for your buds. Made from high quality durable glass, the jar is odor free and smells proof. It comes with an extra lid and it is double layered to ensure that it keeps the flavors into the jar. The seal is 100% air tight and waterproof. If you want to carry a jar with you if you are travelling, then you are in luck because his mason jar is also light and easily portable. You do not have to worry about the smell of weed leaking out especially if you have people around you that you do not want to know if you have the product near you. It is also very affordable.
Water curing
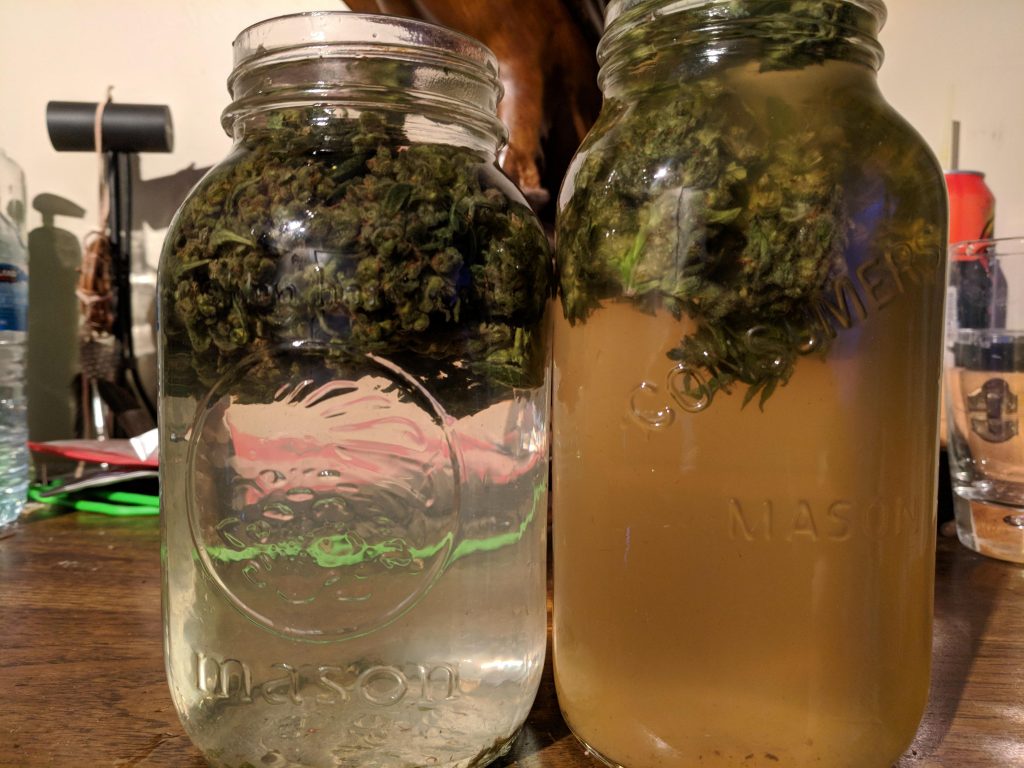
The water curing method starts before drying the buds. The method is an excellent way of removing any unwanted substances on the buds. Clean water flushes the impurities, which helps to improve the taste of the weed and add to its smoothness. The only disadvantage of this method is that in most cases it reduces the flavor of the weed. You can also use jars with water to cure your weed. All you do is follow the same procedure as you would if you are using the basic method but instead of filling the jars with air, you fill them up with water. Allow the buds to stay submerged in the water jars for about a week.
Water, unlike air, speeds up the breaking down of residues substance, which in turn helps the buds to digest their sugars faster. The method also helps to improve the THC potency. After about a week, remove the buds from the jar and dry them, as they dry make sure you keep monitoring them for any old growth. Use only distilled water to flush the buds.
Freeze-drying

Sometimes when you have a high yield you would want to preserve your weed for a longer period. While curing your weed properly and storing them in a cool dark place in airtight jars may preserve your weed for 18 months or more, you can choose another option to store them for even a longer period. To do this, you need to first needed to dry cure the weed using your preferred method. Freezing the buds before you cure them will reduce its potency.
You will also need the help of a freezing machine such as a blast freezer. After you have your blast freezer, place your cured buds on a rack and make sure the temperatures are at subzero. Once the buds are frozen, store them in an airtight jar and freeze them. This method is costly and only people with great expertise can carry it out efficiently. Also note that if you do not have a high yield, you do not have to waste your money on freeze-drying.
[amazon box=”B07GWGJ54Q” grid=”1″]
Sweat curing
Sweat curing is good for people that grow their weed for commercial purposes. It is a popular curing process in South America and the Caribbean. The method is quick and cheap but it does not give the same good results as the other methods. It turns the buds brown and reduces their potency because of the quick curing. The only equipment you need for this method is a paper bag, cotton cloths or paper towels or anything else that can absorb moisture effectively. Put your buds in the paper bag in layers making sure to separate the layers with paper towels or cotton clothes. Place the paper bag out in the sun or next to a warm place and turn the paper bag severally for 5 to 6 days. This is to ensure that no mold forms on the buds. Do not use plastic bags because they will reduce the potency of the weed by affecting the trichomes.
Curing with carbon dioxide

If you want to avoid using light, air and heat to cure your weed you can use the carbon dioxide method. The method uses dry ice, which is from carbon dioxide and gives the same results as freeze-drying. It is also easier than freeze-drying but you have to be careful not to let the dry ice touch your bare skin. What you need for CO2 method is a large container to store your buds with a space big enough for the dry ice. Make sure your do not expose your weed to any heat, light or air, as the method will be futile.
Fill half of the container with dry ice, cover this with a wet cloth and continue to pile your buds on top of the cloth. Make sure to leave some space to allow air to escape from the dry ice. Place your container in a freezer and check on the same 2 to 3 times within the next 48 hours to add more dry ice. The method may lead to the loss of some trichomes but you will still get potent buds.
Other curing methods
Some people want to cure their weed as fast as they can and will use other methods to do so. Some of the most popular methods for quick curing are the use of microwaves, food dehydrators and ovens. As fast as these methods are, they are not the best to use for curing your weed. The sped up the process but they drain the buds of their potency. You may also get a poor flavor and a bitter taste because of the fast drying. If you however have to use the methods because you do not have a choice, then do it properly.
If you are using the microwave, layer the buds between cotton cloths and dry them using the defrost setting. If you are using the oven, set it at the lowest heat and keep the door slightly ajar. If you decide to use food dehydrators, use them the same way making sure the heat is low. Again remember that these methods are not good for curing your weed and if you have to try them out, use a very small portion of the buds. If you do not like the result, then change to any of the other curing methods.
Wrapping it up
If you want weed with the best potency, smoothness, taste, flavor and smell, then you cannot ignore the curing process. It is very vital for your final product and after having put your crop through all the other stages; you do not want to let the effort go to waste by not curing the buds properly. If done right, under all the right conditions and with your best preferred method, you can have something to look at and feel proud about. In my opinion, the best curing method is the most basic one, which is the use of airtight jars. It cures the weed slowly and effectively and it is cost effective. Some of the other methods are not bad either and you can try any of them. Whichever method you decide to go with, just make sure that your buds get the best cure they need and make sure that you store them correctly so as not to compromise on their quality.
We hope this article was of help to you and you will not have any problems when you get to this stage. If you have any comments or questions, kindly reach out to us and we will get back in touch. We will also appreciate if you share this article with others so that they too can get the help they need in curing their marijuana.
Read How to Grow Cannabis Series:
[su_note note_color=”#f1fcdb” text_color=”#0d100c;”]Chapter 1-> : How to Grow Cannabis[/su_note]
[su_note note_color=”#f1fcdb” text_color=”#0d100c;”]Chapter 2-> : Best Marijuana Strains[/su_note]
[su_note note_color=”#f1fcdb” text_color=”#0d100c;”]Chapter 3-> : How To Germinate Marijuana Seeds [/su_note]
[su_note note_color=”#f1fcdb” text_color=”#0d100c;”]Chapter 4-> : How To Clone Weed[/su_note]
[su_note note_color=”#f1fcdb” text_color=”#0d100c;”]Chapter 5-> : Best Vegetation Stage (Vegging) Tips for Marijuana[/su_note]
[su_note note_color=”#f1fcdb” text_color=”#0d100c;”]Chapter 6-> : Best Flowering Stage Tips for Cannabis [/su_note]
[su_note note_color=”#f1fcdb” text_color=”#0d100c;”]Chapter 7-> : Timeline of the Cannabis Flowering Stage[/su_note]
[su_note note_color=”#f1fcdb” text_color=”#0d100c;”]Chapter 8-> : When To Harvest Weed[/su_note]
[su_note note_color=”#f1fcdb” text_color=”#0d100c;”]Chapter 9-> : Drying Your Marijuana Buds [/su_note]
[su_note note_color=”#f1fcdb” text_color=”#0d100c;”]Chapter 10-> : How to Cure Weed [/su_note]
[su_note note_color=”#f1fcdb” text_color=”#0d100c;”]Chapter 11-> : How To Store Weed [/su_note]
Top 5 Best Grow Box Kit On Amazon:
[amazon bestseller=”grow box kit”]
More from my site
 Sour Diesel Cannabis Strain Review & Effects
![Best Flavored Rolling Papers [ 2021 Reviews & Guide]](https://101growlights.com/wp-content/uploads/2019/09/Juicy-Jay’s-Flavored-paper-150x150.jpg) Best Flavored Rolling Papers [ 2021 Reviews & Guide]
Best Flavored Rolling Papers [ 2021 Reviews & Guide] Is Weed Legal In California? California Marijuana Laws & Regulations
![iPlantop Newest 2000w LED Grow Light [Upgraded] Reviews](https://101growlights.com/wp-content/uploads/2019/03/iPlantop-Newest-2000w-LED-Grow-Light--150x150.jpg) iPlantop Newest 2000w LED Grow Light [Upgraded] Reviews
iPlantop Newest 2000w LED Grow Light [Upgraded] Reviews AcuRite Wireless Digital Thermometer Reviews
 Advanced Platinum Series P450 Review: Don’t Buy It Before Reading This!
