The flowering stage of the cannabis plant is one of the most important phases because it determines the end of product of your hard work. It is also one of the trickiest stages and understanding it may seem confusing to some people especially those planting the crop for the first time.it is one of the stages that need optimum TLC or tender loving care for great results. The stage also makes you fall in love with your crops if everything goes right. The following guide will help you to get enough practice and to learn more about THE TIMELINE OF THE CANNABIS FLOWERING STAGE that will get you both excited and make you a better cannabis grower especially if you are an indoors cannabis grower.

[su_button
url=”https://shop.ilovegrowingmarijuana.com/collections/all?aff=4083″ target=”blank” rel=”nofollow” background=”#008000″ size=”6″ icon=”icon: hand-o-right” icon_color=”#ffffff”]BUY MARIJUANA SEED HERE[/su_button]
Some Best Red LED Grow Light for Bloom Booster:
[amazon bestseller=”red led grow lights”]
Flowering of the Cannabis Plant Stage
After choosing your seedlings germination, and watching them go through the vegetative stage; you now get to the flowering stage, which is the longest of the marijuana growth. Most growers assume that the last stages before the flowering stage is the hardest and that they can finally relax and watch their crop mature. This stage just like the others does not allow you to relax but to work just as hard as you did during the other stages. During the vegetative stage, cannabis starts to grow leaves and stems and anyone can tell that it is weed. It is also one of the most straightforward stages because the crop is easy to manage during this stage.
Even when the crop gets the usual common problems, it is easy to nurse them back to health during this stage. The flowering stage however is not as straightforward as the vegetative stage and you need to pay more attention. The stage has two distinct sub phases, which are the pre-flowering stage, and the flowering phase. During the FLOWERING STAGE, you learn more about the kind of strain you have, the gender of the strain and much more. Flowering phase is a sensitive stage that needs care, training and no room for errors.
For most strains, the flowering stage takes an average of eight weeks. However, some strains that take up to 11 weeks in the flowering stage. The different strains in the market are indica, sativa and the auto flowering strain. The indica strain takes 6 to weeks of flowering, sativa takes 8 to 10 weeks of flowering while the auto flowering strain takes 10 weeks from the seedling stage to bud formation. Therefore, before you even begin to follow the timeline of the flowing stage, you should know the strain you have in your garden in order to know when to do what you need to do to keep the crops healthy.
The early flowering stage (Week 1)
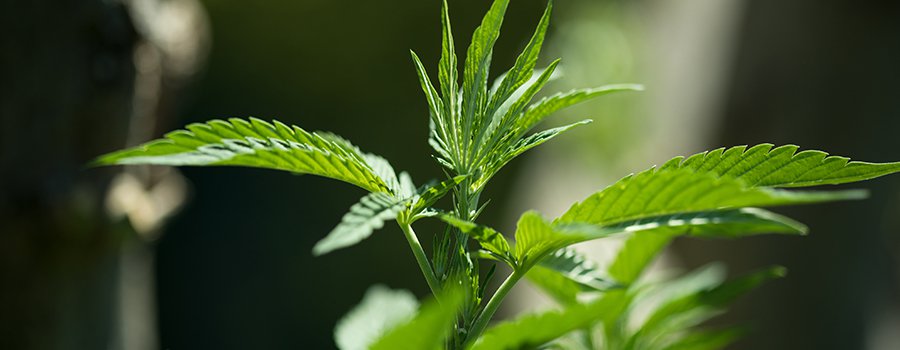
The first stage of the flowering timeline takes place in the first three weeks. Some people assume that the flowering stage starts when they see the appearance of flowers. However, the stage begins with a pre-flowering phase a few weeks before the flower formation. During the pre-flowering phase, the plants receive less light and they start responding to the light schedule changes. When there is an increase in darkness, the plants starts to grow more rapidly, in the process gains more height, and stretches more. This usually takes place in the first two weeks of flowering. Some of the plants even grow to double their size. During this period, the plants need more water than light and special flowering nutrients.
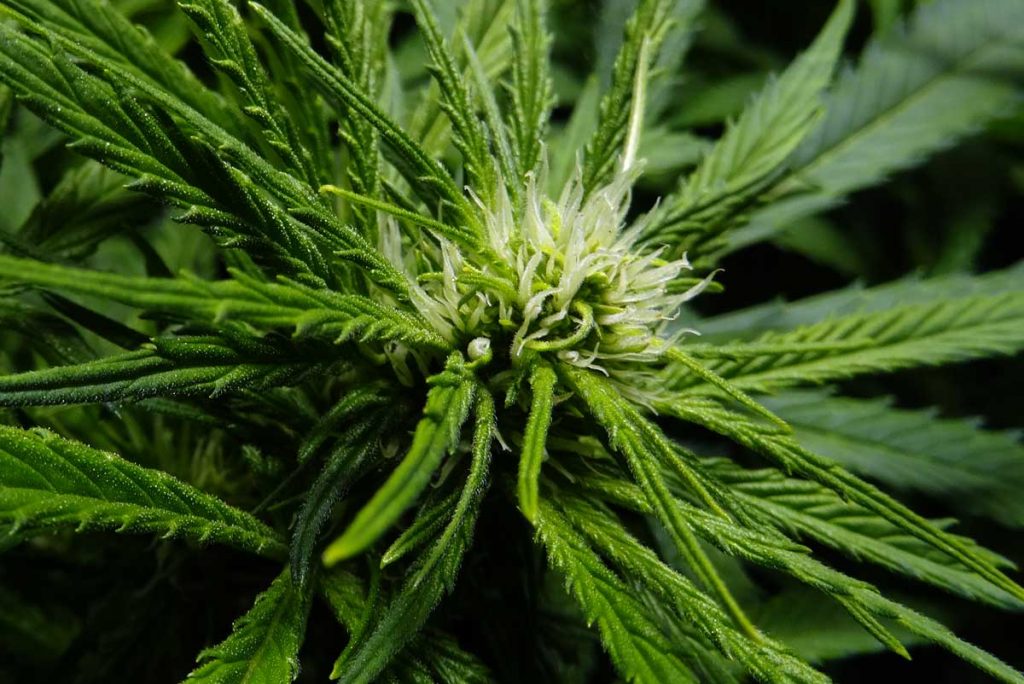
Appearance of flowers (Week 2)
You will notice the formation of the flowers by watching the changes taking place with your cannabis. The first sign that you will notice is the disappearance of internodes. Internodes are the spaces between the leaves. The growth of the plants also slows down or continue to grow at a much slower rate. During this sage, some people assume that the growth is no longer taking place and only those that watch their plants carefully realize that growth of the crops is still ongoing. To make sure the crops continue growing healthily, continue giving them enough nutrients and paying more attention to all the changes.
Flowering for crops growing outdoors happens naturally as compared to indoor crops where the flowering stage depends on several things such as the lighting, humidity, nutrients, air conditioning and more. To ensure that your indoor crops get the message that they should start flowering, give them darkness for 12 hours a day. Some strains may need up to 14 hours. The only strain that does not need the hours of darkness are the auto flowering strains because they start flowering after their predestinated amount of time. The auto flowering strains also grow faster than all other strains with their vegetative phase taking three to four weeks.
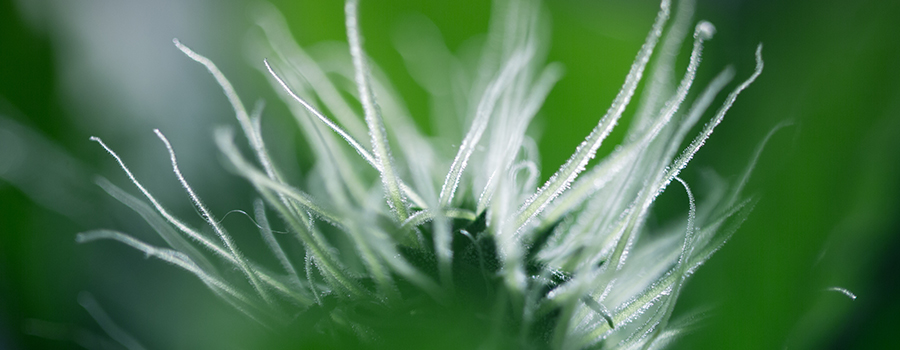
The appearance of the flowers also enables you to tell the gender of your weed. The male plants start to create pollen sacks while the females start to develop pistils. The growth of the male plants also continues and they appear taller than the female plants. The growth facilitates their ability to develop their pollen into the female pistils.
How to differentiate male from female cannabis

For some people especially those planting the crop for the first time, telling the difference between female and male weed may be difficult. Both genders flower so you have to be very keen. Male flowers are smaller compared to female flowers. They have a purple, red, or pale green color while their female counterparts have white pistil stigmas. The male pollen sacks look exactly like balls so there is no way you can miss them. The female pistils have hairy long elongated leaves. You could also have both sex plants in your garden. These are hermaphrodite plants and they are the first ones you should get rid when it comes to pruning out the unwanted plants.
During the rime when the flowers show their color, you should take more care because the potency of THC depends on how well they grow from here. One of the best ways of ensuring that you remain with only the best is by removing the male plants from your garden. If you leave them on, they will fertilize the females and this will not give you what you are looking for. Besides looking out for the male plants and getting rid of them, you will also have to check on the internodes. If the plants are growing and flowering properly, the internodes will look extended and you will notice resin covering the leaves. After the end of the first month of flowering, small clusters form on the internodes. These are buds and from here, you should pay more attention to their development. The buds are what you will harvest after the flowering stage and this is where your weed quality lies.
During the early stages of flowering, the plants are stretching more than they did during the vegetative stage. This is the time that the plants double their sizes and now you can start training the plants if you did not do it during the vegetative stage. The plants are also very delicate during this stage so whatever training method you choose to go with should be friendly. During the stretching period, you may not see any buds sprouting out but pistils will look more visible between the main stem and the leaves. If you see pollen sacks instead of pistils, then remove the plants fast because those are males and they will interfere with the final product in both quality and quantity.
The sprouting of buds – week four to five
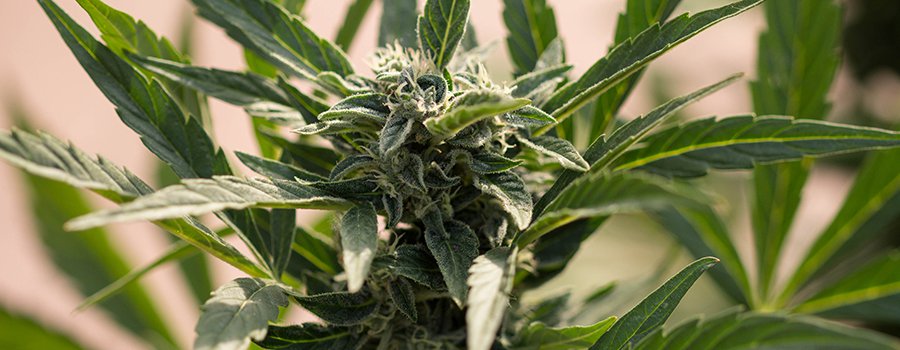
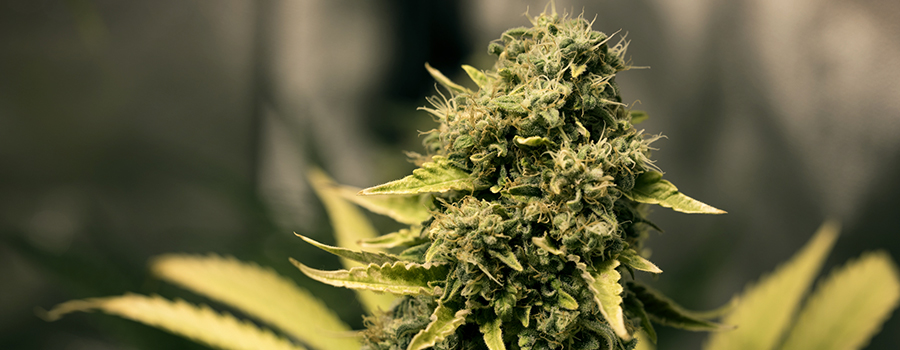
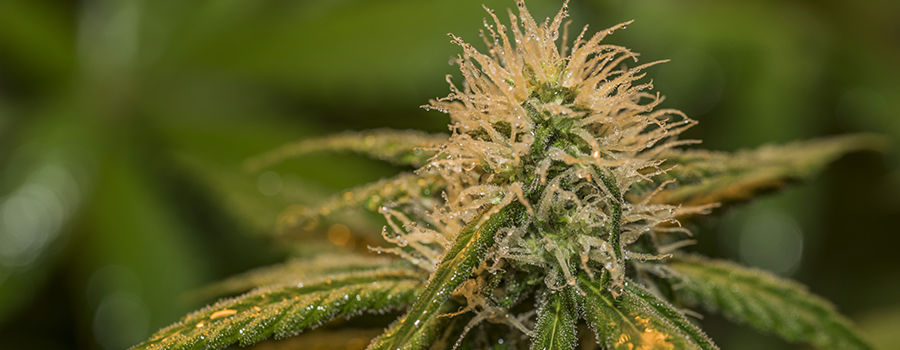
In the fourth week of the flowering stage, the first thing you will notice is that the plants are no longer growing but using the energy they have to growing the buds. The buds at this stage look bigger and fatter though they may still have white hairs sticking out of them. The bigger the buds get the more trichomes they form and the more the marijuana odor becomes pronounced. At this stage, you do not need any more plant training. You should however try to hold them up more if they need any structural support.
As the buds continue to thicken and grow in the fifth week, new buds will also start sprouting up in other places along the plant cola. This will increase the growth of the buds giving you better chances of a bigger yield. The odor will also get more intense. Because of this, you should make sure; that the ventilation of your indoor grow space is good especially if you do not want the odor leaking out. During this stage, the pistils start turning color from white to a darker brown. Some may also term amber and others may retain the white. Some of the trichomes turn opaque while others become milky white with their hairs turning dark. None of these changes should worry you because they are all signs that your crop is almost ready for harvest and growing well.
Late flowering stage (Weeks 6,7)
From week six to the last week of flowering, your plants will give you more indications that they are ready for harvesting. The odor becomes even stronger to a point of a stinking stench of cannabis all around the growing space. Whatever you do during this period should be seamless to avoid any mishaps during harvest time. You should also be keener on any deficiencies on the crops by checking out for leaf discolorations and any other deficiencies. Yellow leaves means that you have a nutrient burn but you can still fix the problem before harvest.
You also have to remember that while many of the strains reach the end of their flowering stage at the eighth week, others may go beyond even ten weeks. This last stage is very crucial and you should handle the buds with utmost care before HARVESTING stage arrives. This is also the time that you start preparing your plants for the harvest and the best way to do that is by flushing.
Flushing
Two weeks before the harvest, when the plants are on their final flowering stage, you should flush them. Flushing the plants also means discontinuing nutrient administering and feeding the plants with only water. The water you give the plants during this time should have a good pH balance. the reasons for flushing the plants is to get rid of the salts and minerals in the soil, which helps to improve the cannabis taste. if you harvest the buds without flushing off the minerals and salt, marijuana will have an unpleasant chemical taste and a bad smell.
Keeping the plants healthy during the flowering stage
Keeping your plants looking healthy and nutritious is very important during this stage. One thing you should remember is that the plants will need different kind of nutrients at this time. The most important nutrients during this stage are still phosphorous and potassium and you should give them in plenty to ensure that the plants go through rapid changes. Besides phosphorous and potassium, nitrogen is also very important and so are other nutrients. As much as the crops need the nutrients at this time, you should not feed them rapidly.
The reason for doing it at a much slower rate is that the crops are very sensitive during this stage not only to nutrients but also to the environment, diseases and pests. One way to confirm whether you are feeding the plants in the right way is by monitoring their color changes. Healthy plants should have a lush green color when the buds are sprouting out. If you notice any discoloration such as a yellow color, it means that the plants have a deficiency, which could most probably be that of nitrogen. A color discoloration also means that the plants are going into stress and you need to take them back to normal.
the nutrients for the flowering phase are different from the nutrients you feed the crops with during the vegetative stage. avoid using nutrients in the final week of flowering to avoid any overfeeding.
During the flowering period, you may notice that the plants will shed off their leaves. This may look alarming to first time growers but it is all good. This is a normal process if the shedding is that of the lower leaves. The lower leaves are not important to the rest of the growth stages, as the plants need all the energy they need for the formation of quality buds. Discolored leaves however or leaves shedding off too fast is a sign that there is something wrong with the plants that needs immediate attention.
[amazon box=”B002KF0D82″ grid=”1″]
How to keep your growing space right during the flowering phase
You will still need to use all the requirements weed needs i for proper growth during the flowering phase. This includes;
Lighting
During the flowering phase, plants need strong lighting up to a certain period. Using the red LED lights as opposed to the blue led lights is more appropriate during this stage. The lighting should be on a 12-12 cycle. An example of a good red LED glow light to use during the flowering phase is the one below
Product Review – ABI 12W Deep Red LED Bloom Booster Grow Light
[amazon box=”B01H2Y5U4M” grid=”1″]
Red LED GROW LIGHTS as we have said is the best for flowering cannabis and this is one of the best products in the market to ensure that you get the best out of your flowering weed. The light delivers 660 nm of red light, which plays a big role in inducing flowering. It is long lasting with a lifespan of 50,000 hours. The LED light has a beam angle of 30 degrees which means that it does not directly light the plants but instead promotes bud growth any direct damage to the crops can destroy the leaves. This particular light is especially great for small-scale indoor growers and if you have a larger grow room you can buy several of them. The light comes with a three-year manufacturer’s warranty
Humidity/temp
Keep the humidity levels at 50% during the flowering period to avoid the rotting of the buds. the temperatures should also be between 2 to 3 degrees centigrade.
[amazon box=”B01FQKXRXA” grid=”1″]
Soil pH
Soil pH of between 6.0 and 5.5 is appropriate during the flowering period. If you are growing the crops hydroponically, keep the pH. levels at between 5.5 and 6.0.
[amazon box=”B00FGPLZZS” grid=”1″]
Ventilation
Proper ventilation is crucial during the flowering phase. make sure air circulates properly because it is during this phase that the buds start to exude pungent aromas. If you have neighbors that you do not want to know about what you are growing, ventilate, and air your room by using carbon filters.
[amazon box=”B074XBXFPD” grid=”1″]
Wrapping it up
Growing weed can be both challenging and very easy depending on the strain and your experience. The time the plant takes from the seedling stage to the flowering stage also depends on the strain and the grow room along with the grow tools you use. However, whether you are a novice or a marijuana enthusiast, growing the crop is fulfilling if you follow all the guidelines. You should treat every stage with the care and importance it deserves and needs remembering that all the stages need different techniques.
The flowering stage can make or destroy your future yield. Besides being the longest phase, it is also the most challenging therefore you gave to make sure you are ready for it. After the last stages of growth timelines, which are the harvesting, DRYING AND CURING, you can sit down and smoke your own weed to check if you succeeded or failed. If you feel that it is good, then the struggle and much wok will be worth everything.
If you are marijuana enthusiast or you want to venture into growing the crop, read our other articles on the growth of weed, which includes guidelines on the timeline of every phase.
Read How to Grow Cannabis Series:
[su_note note_color=”#f1fcdb” text_color=”#0d100c;”]Chapter 1-> : How to Grow Cannabis[/su_note]
[su_note note_color=”#f1fcdb” text_color=”#0d100c;”]Chapter 2-> : Best Marijuana Strains[/su_note]
[su_note note_color=”#f1fcdb” text_color=”#0d100c;”]Chapter 3-> : How To Germinate Marijuana Seeds [/su_note]
[su_note note_color=”#f1fcdb” text_color=”#0d100c;”]Chapter 4-> : How To Clone Weed[/su_note]
[su_note note_color=”#f1fcdb” text_color=”#0d100c;”]Chapter 5-> : Best Vegetation Stage (Vegging) Tips for Marijuana[/su_note]
[su_note note_color=”#f1fcdb” text_color=”#0d100c;”]Chapter 6-> : Best Flowering Stage Tips for Cannabis [/su_note]
[su_note note_color=”#f1fcdb” text_color=”#0d100c;”]Chapter 7-> : Timeline of the Cannabis Flowering Stage[/su_note]
[su_note note_color=”#f1fcdb” text_color=”#0d100c;”]Chapter 8-> : When and How to Harvest Weed[/su_note]
[su_note note_color=”#f1fcdb” text_color=”#0d100c;”]Chapter 9-> : Drying Your Marijuana Buds [/su_note]
[su_note note_color=”#f1fcdb” text_color=”#0d100c;”]Chapter 10-> : How to Cure Weed [/su_note]
[su_note note_color=”#f1fcdb” text_color=”#0d100c;”]Chapter 11-> : How To Store Weed [/su_note]


Hi there, great info – but please check your humidity/temps section, as 2 to 3 degrees C is roughly 35 degrees F. At that temp the plant will freeze to death. 22 to 23 C is much more likely to actually get you a yield lol.. 🙂
What kind of sativa plants need 14 hours darkness? My plant looks great, but is about 3 weeks behind schedule. Trying to narrow down my flaw. Thanks for the your green thumb help!
There is no reason to reduce the light schedule below 12 hrs unless you are growing pure sativa plants. Some landrace sativa plants need less light to flower, but 11 1/2 hours will initiate flowers on hard to flower strains.