With more States now legalizing the sale and use of cannabis than ever before, more and more people are growing the same because of the realization that it is easier to grow theirs than depend on buying the same from other sources. Other people have taken up to growing their own cannabis because they believe they can grow better quality product than what they get from outside there.
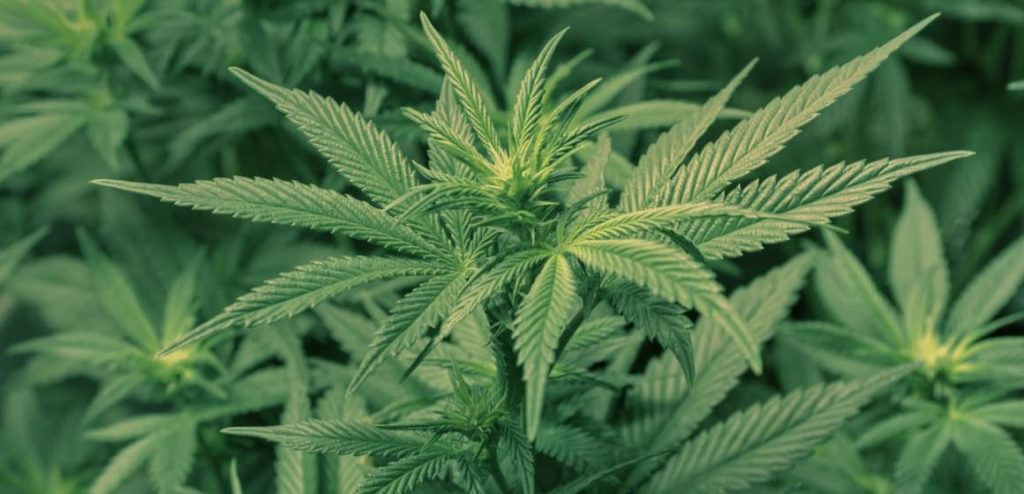
Besides the commercial part of it, cannabis has many other benefits. The product contains two cannabinoids, which are THC and CBD. THC, short for Tetrahydrocannabinol is the one that causes the euphoric feeling or the uplifting mental effects. CBD or Cannabidiol is for medical treatments and does not have any psychoactive effects. Some of the medical benefits of CBD are slowing down the progression of diseases such as Alzheimer’s and relieving pain for people going through chemotherapy. It helps to heighten people’s creativity because of the dopamine it releases into the brain. for some people, weed helps then to sleep better by decreasing anxiety. Other benefits that come with using weed are it helps to reduce seizures, helps to increase appetite and to reduce nausea. These and many more health benefits are what make cannabis growing an important feat.
Growing cannabis may seem like a complicated thing to do especially for those venturing into the activity for the first time. However, if you follow the right guidelines on how to grow, then you can pride yourself for attaining a quality and good harvest. Growing your cannabis should not be a spur of the moment thing. You do not do it because everyone else is suddenly growing the crop and you definitely do not do it because you are looking for the fastest way to get high without buying it from elsewhere. growing the crop needs planning because the cannabis plant, just like many other plants needs proper planning and all the right ingredients for it to flourish.
10 Guidelines on How to Grow Cannabis
Choose Your Place to Grow
Choosing the place you want to grow your cannabis is the first most important factor. Though people grow cannabis both outdoors and indoors, many people today are opting for indoor growing because of the privacy and better crop control. Growing the crop indoors is also less expensive and easier to start even for those growing weed for the first time. Growing the crop indoors also means better maintenance and you can easily monitor the growth.
You can control all the necessary requirements the crop needs such as water usage, humidity, temperatures and light better indoors than you can when growing the crop outdoors. The crops rely on your total input for growth. When growing the crop outdoors, the crops will largely depend on nature, which sometimes can get bad socially when temperatures fall or the sun becomes too hot.
Growing cannabis indoors
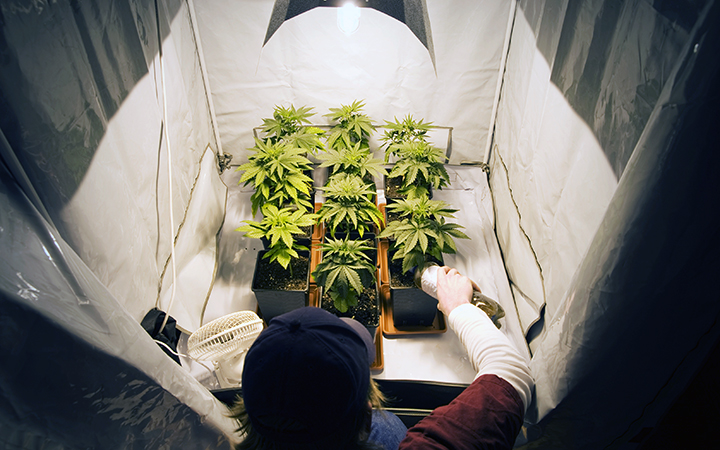
You can choose to grow your cannabis indoors in any of the following places grow tent, grow room, closet, in the garage, in a spare room, in an extra room in your home, inside a cabinet and many other choices. Whichever place you decide to grow your cannabis indoors make sure that the grow space has the required temperature. Temperatures in enclosed spaces tend to go up especially if you use grow lights and leave then running. In the early growth stages of the plant, it is okay to keep the temperatures warmer because they grow faster. When the crops get bigger and older, it is best to reduce the temperatures to enable the buds get the best color, smell and trichome production.
During the early stages, you can keep the temperatures as high as 70-85 degrees Fahrenheit while during the older stages; you can keep the temperatures at 65-80 degrees Fahrenheit. Grow lights play a major role in keeping the amps high in your grow space. They are the source of heat and light and the more powerful your lights are the more heat they radiate. To minimize the heat from the lights, especially if you decide to install many lights, make sure you have an air conditioner in place too. If you are not planting too many weed crops, you can just install a fan that will help in pulling out the hot air in your grow space.
Also, make sure to choose your grow lights carefully as some tend to produce more heat than others causing some problems to the crops. When you are prepping your indoor grow space, make sure that it is completely clear of all the things you do not need. If you are using your garage as your space, get rid of anything lying around such as carpets, furniture, decorations, and old tyres and so on. Ensure that the plumbing and electricity are easily accessible and that the room has enough ventilation.
[amazon bestseller=”grow tent kit” items=”1″]Growing outdoors
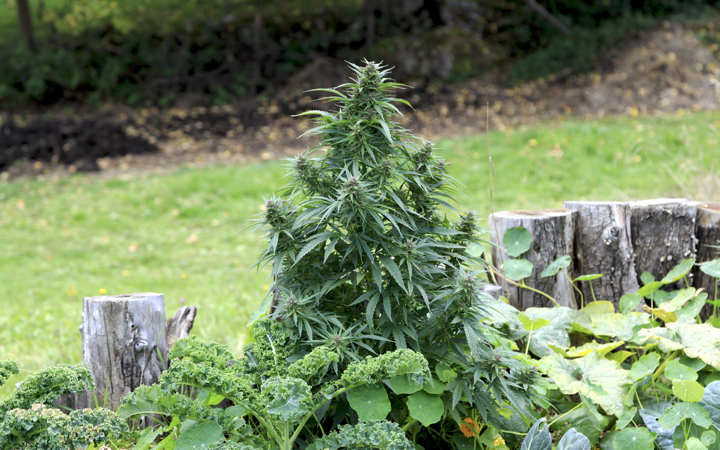
Some people choose to grow their weed outdoors because the requirements are less than what you need when growing outdoors. For starters, you do not need to buy any grow lights, as your weed will use the natural light from the sun. Heat too will be from the sun and when growing outdoors you do not need any air conditioners or fans to control the heat and light. The one thing you have to deal with though is lack of privacy. With your crops being out there where everyone can see them, you risk people stealing the crop just when you are about to harvest, pollination, flooding, animals and bugs eating at your crops and natural calamities.
You can however avoid many of the problems that come with planting cannabis outdoors by choosing the right strain for the place you want to grow. Remember that you cannot help with what nature dishes out and sometimes when it is too hot, your crops may die or wither. The only option to protect cannabis growing outdoors from extreme weather conditions is probably by putting up a green house. It is also important to note that if you choose to grow your cannabis outdoors, you have to contend with a longer grow time as compared to growing the same indoors.
Though some people say that cannabis grown outdoors has a better flavor than that grown indoors, you have to look at all the benefits that come with both spaces before you decide to go ahead with the exercise. Outdoors may be cheaper but for urban dwellers, it is impractical. Outdoor cannabis will not be at your mercy but at the mercy of Mother Nature. Now that is something you cannot control but you can control everything indoors. Indoor grow time is shorter compared to outdoor grow time and the buds are of very high quality.
[amazon box=”B007JLHM40″ grid=”1″]Choose Your Light
The next step after deciding where you want to grow your cannabis is choosing the lighting. Cannabis needs grow light in order to produce high quality buds. If you choose to grow your crop outdoors, you only have to contend with one source of light, which is the sun. If you choose to grow your crop indoors, you have a choice of different kinds of lights. the kind of lights to use for indoor growing are LED GROW LIGHTS, LEC Grow Lights, Household LEDS, T5 Grow Lights, Metal Halide and High Pressure Sodium.
Before hanging the lights, make sure you check that the wiring system is up to date by testing everything. You do not want the place burning down from an electric fault just after you have planted your crops. Below is a look at how each of the lighting systems helps with the crop growth.
LED grow lights
Using LED grow lights is one of the most common lighting sources many indoor cannabis growers use. They are more powerful than all the other lights and they come in different shapes, brands and lighting power. Many people also like them because they are attractive with some having very appealing designs. If you are looking for one standard model that serves all, it may not be possible because no model is the same as the next one.
The only advice I would give here is if you are to go for any LED grow light model, make sure you have read the reviews and be sure the brand has gone through testing. If you are not sure, ask the manufacturer of the brand you choose to go with all the questions you need answered before the purchase. You can also read about out collection of the best LED grow lights for cannabis growing.
[amazon bestseller=”full spectrum led grow lights” items=”3″]The sun
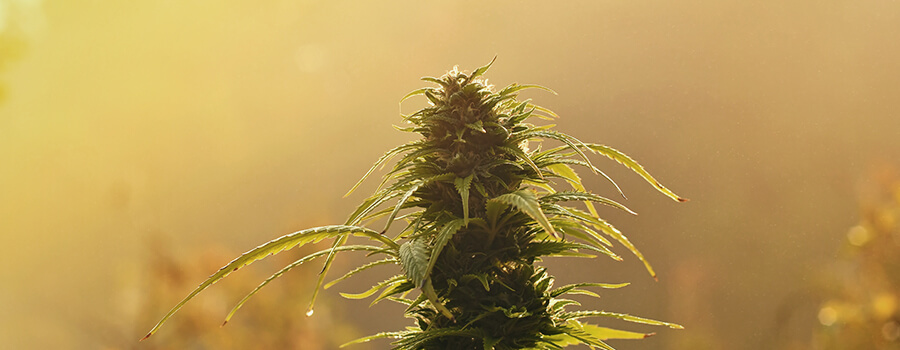
The sun is natural and you do not have to pay a dime for it. if you choose to use the natural light from the sun, you have to make sure that your cannabis plants get at least eight hours of light daily. The best time for the crops to get direct sunlight from the sun is between 10 am and 4pm. you have to understand the cannabis plants needs more light than many other crops for it to thrive. If you are growing your crops indoors and you do not have enough light from the sun, make sure you get more grow light from other sources. If you are growing the crops in containers that are moveable, make sure you move them to places where they can receive adequate light especially from 10am to 4pm.
LEC grow light
Light Emitting Ceramics is a kind of light that many people no longer use as much as they did in the past. With rebranding of the light, some cannabis growers are using it because it comes with favorable benefits for the crop. Some of the LEC light benefits are its natural color, which makes it easier diagnose and care for the plants. They help to increase the trichome production of the crops because of their significant levels of UV light. The lights also do not emit electromagnetic interference (EMI) which makes it impossible to tract down the crops in case of a curious enthusiast, and they enable fast growing of the crops.
[amazon box=”B00HBCV8TM” grid=”1″]Household lighting
Household lighting includes the use of fluorescent light bulbs and household LEDS for growing your cannabis. though the lights are not for growing any kind of crops, some farmers still use them because they are cheaper to buy and more readily available. You can buy household lights from store without arousing any suspicion. Sellers will assume you are buying them for use at home. They do not have the same power as led grow lights or other grow lights do and they may produce less effective results.
[amazon box=”B000NISDNU” grid=”1″]Metal halide and high-pressure sodium
Most indoor cannabis growers use the above lights because of they are powerful, easy to set up and affordable. The lights provide consistent indoor results for the crops though they can get too hot sometimes which makes the electricity bill go up. It is very necessary to choose the correct lighting that responds to the size of your grow room. Though not a very popular choice even with the large-scale growers, the lights are still effective and they produce just as much as the led grow lights help to produce.
[amazon box=”B06WVFZZHF” grid=”1″]Reflective material
To make the best of your indoor lighting system, you should also have REFLECTIVE MATERIAL on the walls. This is necessary to avoid light from escaping the grow room. You can also paint the walls white if you are not in a position to buy the reflective materials. Whatever you do, avoid black color because it absorbs the light and your growing crops need every light they can get from the light bulbs and LEDS. You can also make the system easier by using a time switch so that the lighting goes off when needed and goes on again when the crops need it for proper growth.
Choose Your Growing Medium
As we said earlier, cannabis needs several things in order to grow. Irrespective of the space you choose to grow your crops, you must make sure that your choice of medium is the best one for them. The most common grow mediums that many cannabis growers use are soil, and hydroponics.
Soil
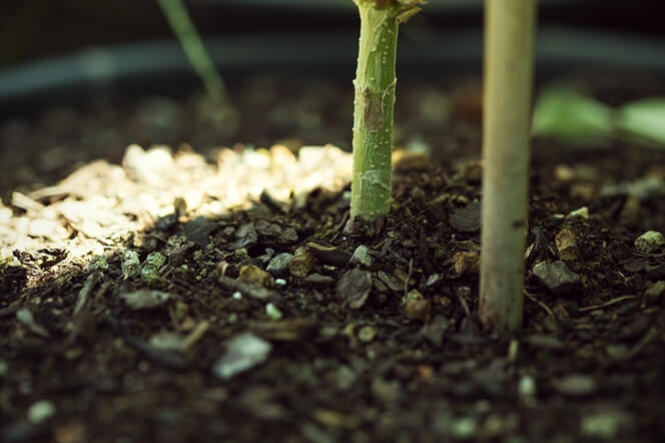
Knowing the best soil to use for you crops is very important. Cannabis growers use different kinds of soil for their growing. Some compost their own soil while others buy their compost soil. Others prefer to use potting soil. For those that compost their own growing soil, also known as super soil, have the advantage of harvesting some of the healthiest cannabis in the market. The soil makes the weed grow fast and healthy as it contains organic ingredients broken down naturally to mimic rich and good soil.
The soil is ideal for both indoor and outdoor cannabis growth. Using super soil also does not require too much monitoring apart from watering and harvesting. Many of the growers that use super soil say the crop has better and smoother buds than those planted using other mediums. the only disadvantages of using compost soil is that you cannot just up and start growing as the soil needs 30 to 60 days of composting. You therefore need to plan and remember that the mixing process is not as easy as it sounds. Crops growing using compost soil take longer to mature than those growing hydroponically.
Hydroponic growing
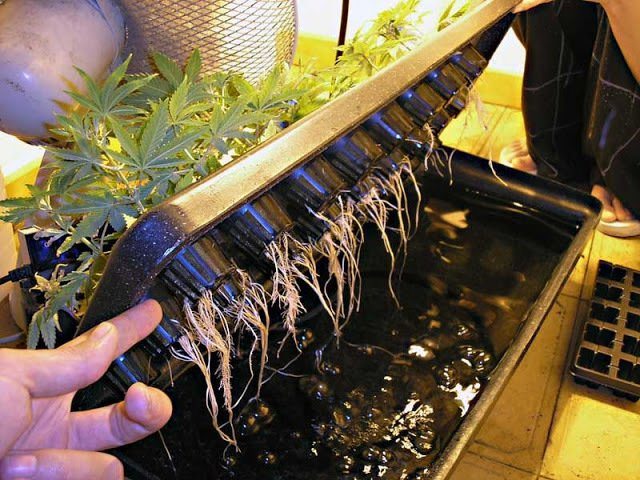
Another very common method of growing weed is through soilless mix. This is by using perlite, vermiculate, coco coir, or growing directly in water, also called hydroponic growing. Hydroponic growing involves growing your crops in an oxygenated solution of nutrients and water instead of growing them in soil. though those growing cannabis for the first time find it complicated to do so hydroponically, it is not as hard as many people think. Hydroponic grown cannabis grows very fast and you can have your harvest in three to four months. The yields are also high and the potency of the weed is better with hydroponic grown plants.
The system is very easy to maintain and set up. Hydroponic crops can fit in any room and all you need to take into consideration is that your cannabis gets enough nutrients; good temperature control, light and root rot prevention. There are different methods of growing the crop hydroponically but the most popular method is DWC or DEEP WATER CULTURE. In DWC, the plants roots stay in water all throughout the growing phase. To prevent the plants from drowning, the system uses an air pump, which infuses water with air. All the nutrients that your plants need during the phases of growth are all mixed in the water solution.
The method is one of the easiest because for one you never have to think of watering your plants. It is also a favoirite for those growing marijuana professionally just as it is for those starting out weed farming. DWC also works best with larger amounts of cannabis plants.
[amazon box=”B00CHEIO6Y”]Get Cannabis-Friendly Nutrients
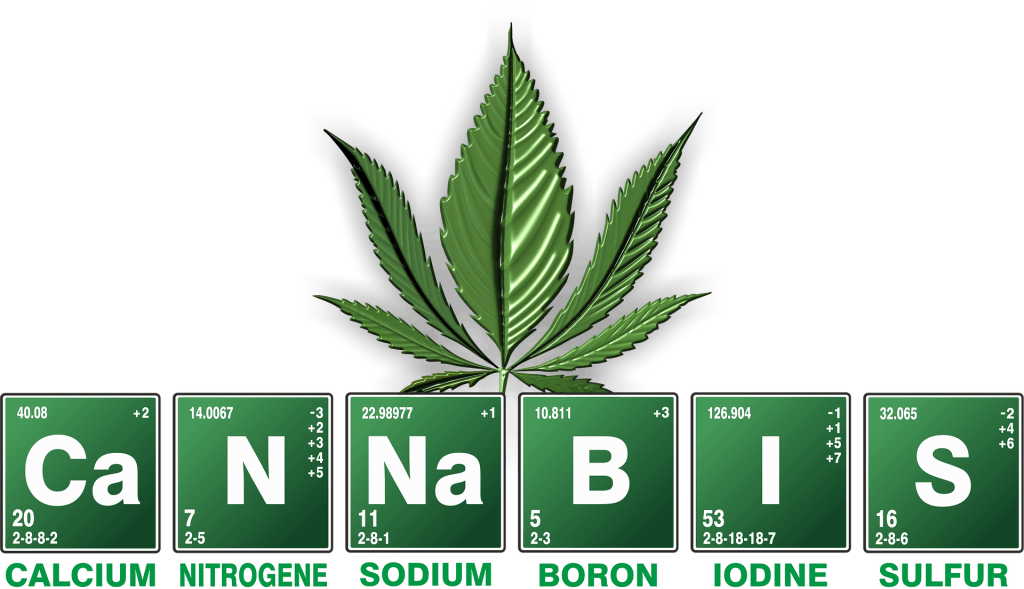
Once you have your medium, the best step is to choose the nutrients that will feed your crops until they mature. Those that use organic soil for their growing may assume that the soil is rich enough and they may not need to add any more nutrients. Though the soil is rich with organic matter, you may still need to add some cannabis nutrients especially during the flowering phase. The reason for doing this is to ensure that you get the best from the drops and at this stage, the cannabis plants feeds more than it does during other stages. For HYDROPONIC growers, you will also need to get nutrients specifically formulated for this kind of growing medium.
Some of the nutrients are very specific and you can only use them in certain kinds of growing. One good example is Canna Coca, which you can only use in Coco Cair growing medium. You can use many other nutrients for all kinds of hydroponic growing. When using nutrients in hydroponic growing, you should be very careful about keeping the pH of the water at allowed levels. Anything beyond the norm will lead to root rot. This however does not apply so much in organic soil growing as the organisms in the soil keep the pH. levels normal. You will still not lose anything by checking just to be on the safe side. Nutrient deficiency also leads to low pH. levels and even though some growers completely ignore this stage, it is very important to tick it on your calendar if you do not, then you might harvest a very low quality yield or nothing at all.
The best nutrients come labeled with NPK ratios indicating the percentages of Nitrogen, Phosphorous and Potassium in the mix. These are the most important nutrients that all plants need for quality and healthy growth. Nitrogen promotes and fosters the growth of the plants, Phosphorous helps with the root and flower growth while Potassium helps to promote photosynthesis and root development. The Potassium levels should be the highest while you should always keep Phosphorous levels at medium to high levels during the vegetative and flowering phases.
For Nitrogen, keep it high during the vegetative phase and low during the flowering phase. Other nutrients you can use are a hydroponic fertiliser for the first phase of the growth and during the flowering phase. You can also add other secondary nutrients to your mix during your hydroponic growing. These secondary nutrients include Magnesium, Calcium, Sulfur, Micronutrients and other trace minerals.
[amazon bestseller=”cannabis nutrients” items=”1″]Where to Get Cannabis Plants
Getting cannabis seedlings and clones is very easy especially among cannabis growers. Buying clones is even easier than selling seedlings. Though this is all good, you as the buyer must make sure that you can trust your seller to give you the best strains. If you are buying from someone you do not know, you may buy the wrong cannabis genetics. The reason why it is important to buy the right seeds is that weed comes in a myriad of strains all with varying hybrids. Some of the varieties even have auto flowering qualities. It is therefore very important to know the strain you are buying and the sex of the seedlings. Many of the regular seeds are a mixture of both male and female and for you to harvest what you want; you only need the female seeds.
In some very rare cases, there are hermaphrodite seeds in the mix. These seeds have both the male and female characteristics. the horror of having both sex species in your mix of crops of that this type of weed can self-pollinate itself and pollinate other female crops which does not go well with the final harvest. This reason is why many people choose to buy their seeds online because they do not know locally trusted sellers personally. If you are buying online, make sure the seed bank is a reputable firm. If you know nothing about the various cannabis strains, carry out some research to familiarize yourself. There are thousands of strains with each strain having its own advantages and disadvantages. The things you should know are recreational vs. medical benefits of the marijuana strain you want, mental and physical effects and the appearances of the buds, the color of the leaves and flowers and the smell.
Once you know these facts, narrow down your search to what you are looking for and then compare the ones you will choose to decide the strain to use. This is a critical stage and if you do not get it right here, then chances are you will have many pitfalls along the way. The most common cannabis strains are sativa, indica, and auto-flowering strains. The sativa strains have the tendency to grow into long buds and tall especially during the flowering phase. They are also heat resistant and have an easier upbeat effect. The indica strain does not grow tall and they grow better in cold. The effects of the indica strain are heavy and relaxing. The auto-flowering strain is a mix of both sativa and indica. They are small and have the shortest cycle. They are good for people starting out the weed growing business the reason they have the name is because do not need any light to start flowering but do it automatically.
Germinate Your Seeds / Start Your Clones
You have the place, the medium, the nutrients and lighting on so now it is time to being your cannabis-growing journey. The first step in cannabis growing starts with germinating the seeds, which is not a one-method fits them all phase, as there are many different ways to germinate the seeds. The most important factor to take into consideration before looking at the different methods of seed germination is that the process should take place in the dark.
Even if you have set up your lighting system, you should not flick the switches on during the germination period. the easiest method and that which many people use especially those that growing for the first time is to germinate the cannabis seeds using a smart start kit specifically designed for weed seed germination. Other preferred methods are direct germination of the seeds into your preferred medium, the paper towel method and the glass of water method. Below are short explanations of the three methods.
Paper towel method
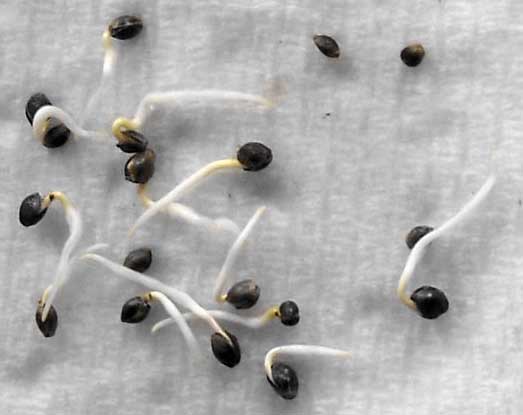
This method is very simple and a preference for many people. What you do is simply take your seeds and place them in between two sheets of paper towels. Take your spray bottle and moisten the towels without soaking them up. Place the paper towels in a container such as a lunch box and leave the lid off. Place the container on its side to allow gravity to take its course. Make sure the room is dark and at room temperature. Other places that are ideal for paper towel germination indoors are cabinets especially in the bathroom because it is a damp place and the cabinets are dark spaces.
Keep the paper towels moist constantly and if you do it correctly, you will see the seeds sprouting in the next 24 to 48 hours. This method is simple but only becomes tricky when transferring the germinated seedlings to their medium. Sometimes the method also leads to the seeds rotting because of too much water in the paper towels. As simple as it may look or seem, it is delicate and only those with very steady hands can manage this.
[amazon box=”B07CP644DT” grid=”1″]Direct germination
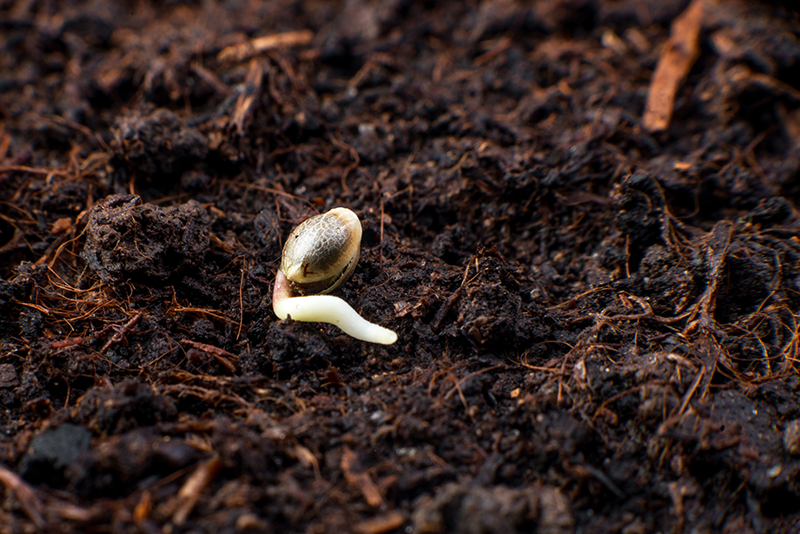
Direct germination is a no fuss method that many growers especially the newbies prefer. It requires planting your seeds directly into your preferred medium. Dig a small hole in the medium and plant your seed. Cover the hole and sprinkle some water to keep the place moist. In 3 to 7 days, you should see the seed sprouting out of the medium surface. Make sure not waterlog the medium otherwise your seeds will rot. Keep the temperatures at between 20 to 22C when germinating in a medium and the humidity levels at 59 to 70%.
The glass water method

Though not too many people use this method, it germinates the seeds without too much fuss. The method is also not scientifically proven to be 100% effective so you have to be very careful when using it. It is however one of the simplest ways to germinate your seeds. All you do is drop your seed in a glass of water and in 2 to 3 days, your seeds will start to sprout. The method kills some few seeds along the way and though we do not recommend this procedure, some people succeed in growing healthy crops by germinating their seeds using the process. Another disadvantage with the process is that due to too much water, the seeds may suffocate or rot.
Cloning
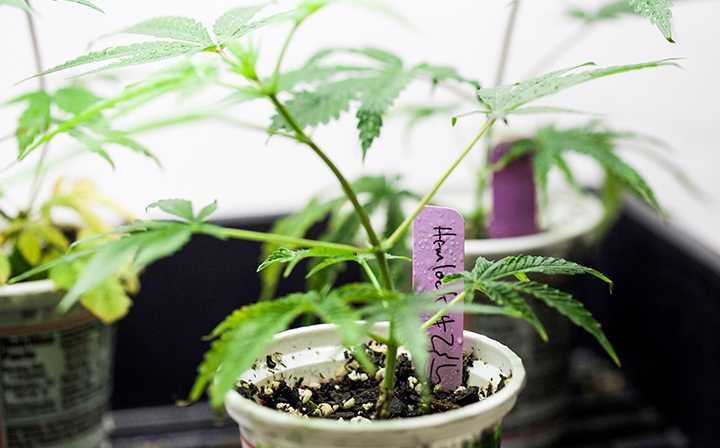
When it comes to germinating clones, it gets even easier. Cloning involves cutting a part of your existing cannabis plant to create clone cannabis. If you are new in the growing business, you can get clones from existing weed farmers. Cloning, also referred to as vegetative propagation develops roots when exposed to the right conditions leading to the growth of new crops. One of the major advantages of using clones is that you already know the traits of the mother plant so you will know the quality of harvest to expect.
If you are cutting your clubs from your older crops, what you will need is a sharp razor for cutting off the part, a container with your growing medium, a water spray bottle to keep the clone moist and rubbing alcohol. The rubbing alcohol is to ensure that everything you use is clean and sterilized including your hands as you handle the clone from the mother plant to the medium.
Now that you have your germinating seeds ready to grow into the weed crop you expect to have, you get ready for the next stage, which is also one of the most important phases of the weeds growth. This is the vegetative stage and the phase determines the kind of quality to expect from your crops before they get to the next stage.
[amazon box=”B004Q3NN4W”]Vegetative Stage – Only Stems and Leaves
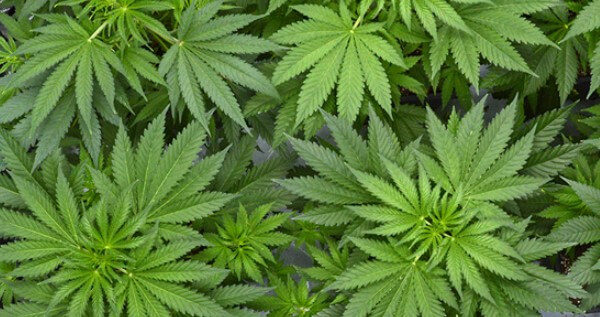
Once you have transferred your seedlings to your favorite medium, you will continue monitoring them and tending to them feeding them with what they need until you see the first set of leaves. Now you are getting into the vegetative phase, which is the foundation of your crops development. This stage lasts anything from three weeks to two months depending on how well you take care of your plants and the medium you use. The last time the plants need during this phase is three weeks and anything less than that is not ideal. You can also decide on whether you want to rush the plants to the next stage or keep them at this stage for a longer period. The vegetative stage determines the final yield of your crops. The kind of strain you choose too will determine how long the vegetative stage will last. Some people that want quick harvests jump the vegetative stage and put their crops to the next stage.
Jumping the stage however will not give you the same kind of plants as the ones that go through all the stages as they tend to be smaller and do not yield much. For best results, the best time to keep your crops on the vegetative phase would be 4 weeks with 18 hours of light every day. This will ensure you good results and quality yields. This is for people growing their crop indoors. If you are growing outdoors, make sure your cannabis seedlings get at least 5 hours of uninterrupted direct light from the sun and if possible, from 10am to 4pm. if you leave the plants to search for light, they will stretch leaving spaces in between their nodes and branches. This may lead to poor yields. Another thing you can do during the vegetative stage to maximize your yields is to get your plants as bushy and dense as you possibly can. To achieve this feat, you can use the following approaches – fimming, topping, low stress training, defoliation, stress training and supper cropping.
Topping and fimming involves cutting a stem off the plant just above its second set of leaves from the top. This procedure may slow down growth but after a while, the plants start growing healthier. Defoliation is the removal of some leaves to control the growth speed and shape of the plant. Low stress training is bending which helps the plants to grow buds horizontally. No cutting takes place during the stress training. Super cropping or high stress training takes place at the end of the vegetative phase or during the flowering first stages. This exercise involves laying the buds sideways by snapping the branches below the flowering clusters, which helps the buds to get more light without any other plants shading them. This exercise is however, a high-risk task and only those that have experience van do it, if you are starting weed growing for the first time, you should not try this task.
[amazon box=”B0791N63L2″]Flowering Stage – Buds Start Growing
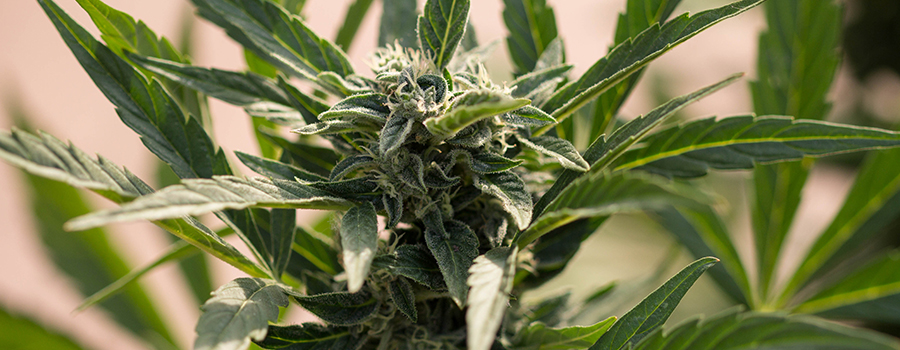
Flowering is the last stage before you harvest your marijuana and it is one of the most important stages of the crop. This is also the stage that you find out the sex of your marijuana I know for people that are new to this are wondering how a plant has genders. The flowering stage of the weed plant is also its puberty stage. If you bought strains that you did not know about, the most likely outcome will be an equal number of boy cannabis and girl cannabis. Many of the seasoned growers like to grow the female cannabis because they are the ones that bud. Male plants on the other hand make pollen sacs that cannot be smoked. If you are still wondering how to identify female cannabis from a male one, here is what to look for.
When they start flowering, female cannabis grow wispy white hairs or calyxes at the tips of their branch joints. These calyxes then make buds by growing on top of each other. With every calyx having white hair growing out of it, it means that the weed growing there is of high quality. Male cannabis on the other hand have no white hairs emerging from their branch joints. What they have instead are pollen sacs with no psychoactive properties. They are also detrimental to the production of weed because at this stage they can pollinate the female cannabis making the produce less buds bit more seeds.
For the farmers that know all this about the beauty of keeping only the female cannabis in their gardens, they get rid of the maque cannabis in order to harvest more yield. During the flowering stage, keep the temperatures cooler than usual for more trichome production and good color formation. The lighting schedule should be 12-12 which means half the day, you keep the lighting on and the other half; keep the light away from the crops. During this stage, many of the plants die too due to lack of nutrients. It is a critical stage and you should ensure that your plants have enough energy to allow the growth of buds.
Harvest Your Cannabis
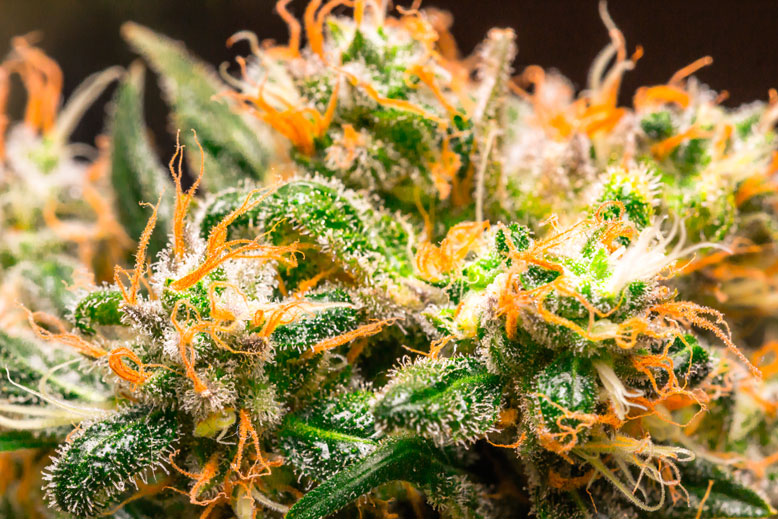
Now this is that stage that every grower looks forward to after seeing their crops go through all the stages of growth. Your hard work is finally paying off and it is time to harvest your weed. For the novices though, how can you tell if your weed is ready for harvesting?
The first sign that your weed is ready for harvesting is when she stops growing buds. Instead of any further growth, the buds start to emit a certain fragrance that every weed user and farmer knows. For those familiar with the strong weed smell, it is very hard to miss. Timing is very crucial during the harvesting time and even after noticing all the signs that your plant is ready to harvest, do not jump to start the harvesting immediately. Wait until the white hairs change their color from white to a dark color. You do not have to wait for them all to change color but once you have about 40% of them with a darkened color, then you know it is time to start harvesting.
If you are looking for higher THC levels, wait until you have about 80% of the white hairs turn dark. Some of the best-known weed products with high potency THC were harvested when about 90% of the white flowers were darkened. Though this may be the most anticipated period by majority of the growers, it is also the hardest part of the whole growth system. Some people do not know the correct methods to use for harvesting especially as they do not know whether to cut the plant down or trim it first. Excitement also gets to some growers and they harvest the plants as soon as they notice the first signs of maturity. If you are looking for higher yields, you should forget about the excitement for a while and harvest your buds in stages.
Read Next: Best Marijuana Bud Trimmer
Check the buds that looks most mature and start with those first. By doing this, you will be giving the other ones some few more days to give you a much higher yield. When harvesting, make sure to cut the whole plant from the root and take off any leaves not connected to the buds. Trim off the small leaves making sure you first get rid of those without trichome. This process, also called manicuring leaves you with only what you need.
[amazon box=”B079Q4LYWK” grid=”1″]Dry & Cure Your Buds like a Professional
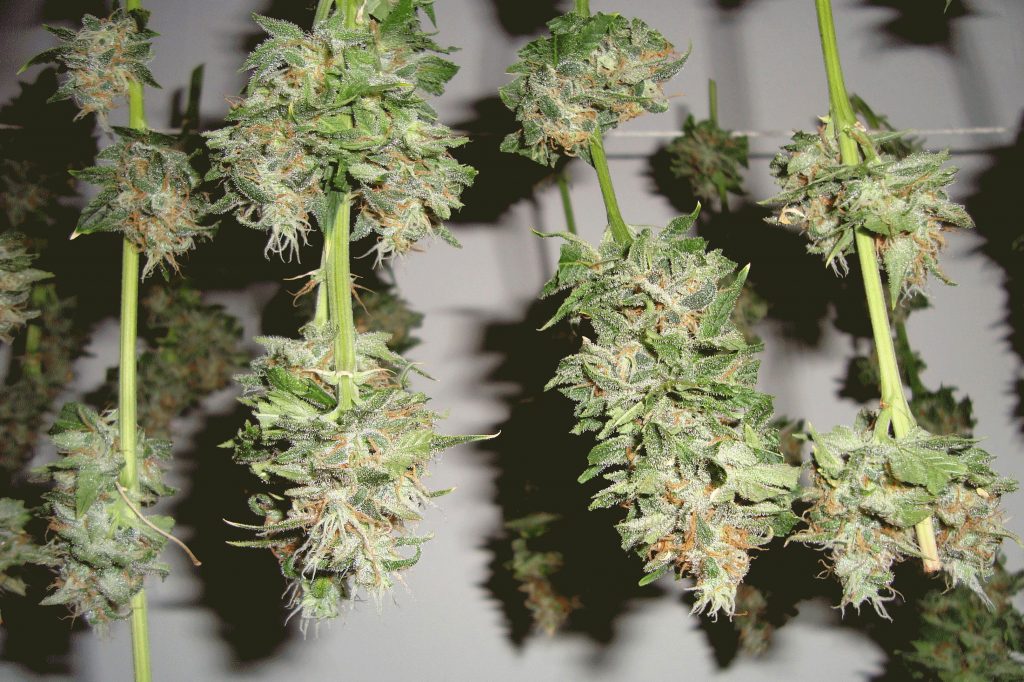
Now that you are through with the harvesting, there is only one other stage before you sell your marijuana. This is the drying and curing stage. This is also another sensitive stage where you can lose it all if you are not careful. During this stage, you want to lay out or hang your buds to dry without over drying them or making then become damp. The best way to do this is to hang the buds upside down on a string. You will need a well-ventilated room for this and constant monitoring to check out for mold formation or over drying. You will know your cannabis buds are dry when their stems snap. Cannabis buds with thicker stems will not snap but bend. If you think you are now done, you are not.
There is still one last stage and that is curing your cannabis buds. How do your cure your buds? The word cure may sound like you treat them with some concoction but that is not the case. Curing cannabis buds involves putting them, after you are sure they are completely dry, in a tightly closed jar and storing it in a cool dark dry place. Do not fill up the jars completely but leave about a quarter of the bottle empty. During the first two weeks, open the jars for a few seconds every day to let the weed to breathe and release any moisture formed inside the jars. Touch the buds to feel if they are moist. If you notice that they are moist, leave the jars open for a longer period until you feel their dryness once again.
Curing and drying your cannabis comes with several benefits such as improving the taste of the weed, reducing any risk of mold formation and smoothing the buds to avoid coughing. This process also helps to decrease paranoia and anxiety. To be on the safe side, use gloves when handling the buds because of the resin that makes them sticky.
[amazon box=”B0748CN7RY” ]Wrapping it up
Embarking on cannabis growing is both fun and rewarding. It is not a hard thing to do if you follow all the guidelines. The most important thing to take into consideration is making sure that you have everything you need and you keep your plants happy by giving them what they need. If you have happy crops, then you will definitely harvest a good quality yield. With the guidelines we have given you above, there is no reason why you cannot grow your weed like a professional. You can also enjoy the money that comes with from your plants because truthfully, marijuana is one of the fastest selling products.
If you have anything to add or any comments or questions to ask concerning the above topic, reach out to us through the comment box and we will get back to you. Other than that, we wish you great fun as you embark on this journey.
Read How to Grow Cannabis Series:

