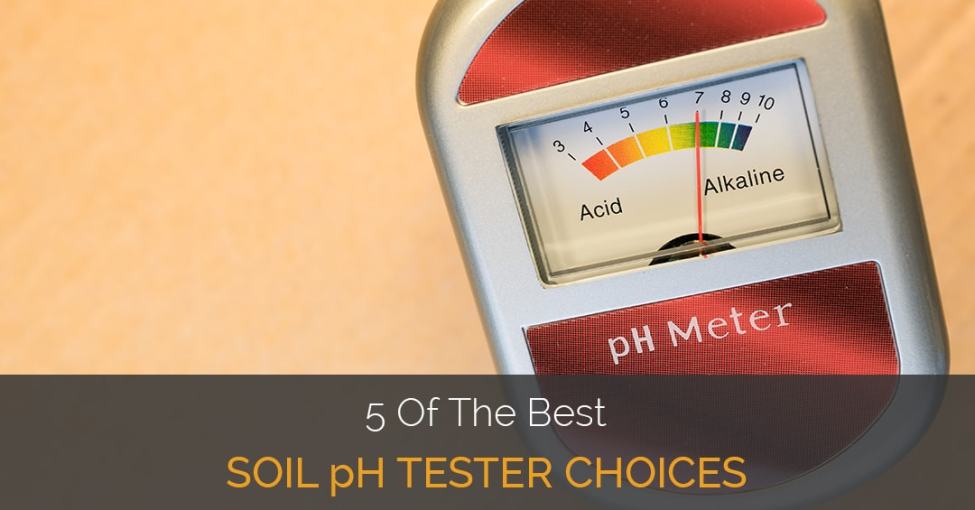
Being a successful farmer does not come easy. You have to toil and start from the bottom if you want to reap good yields from your crops. You have to draw a plan and stick with it. One of the first major things to do is carry out a soil test to check if the soil you want to use for your crops has enough nutrients to make your crops grow well. You need to check if the soil PH is compatible with whatever crop you want to plant. Once you confirm that your soil is viable, you can then proceed to prepare your land to make it ready for the seedlings. A soil PH tester does more than just confirm whether the PH is good or not. It also allows you to know the kind of fertilisers to use for your crops.
The question many people ask is whether it is necessary to go to all the trouble of checking if the soil PH is okay for your crops. Soil as you all know, is the most important component in farming. You may think that you know about the soil you are using but in majority of the cases, you know almost nothing. Maybe many times you have had failure after failure of harvests but never bothered to find out what the reasons were behind the failures. Learning about the texture, drainage, composition, mineral density and the acidity of the soil will in future help you to avoid many disappointments. If you do not know how to carry out these tests, you can always hire an expert to do it for you.
An effective soil test also determines the expected growth potential of the crops and the fertility levels of the soil. It can also indicate what nutrient deficiencies exist and if there are any toxicity from inhibitions and excessive fertility. This test mimics the root function in mineral assimilation. In areas that are waterlogged, soil testing may not give you the ultimate results because the sample of the soil may not be up to date. This also goes for frozen places. In other places, the best time to test the soil is a month before planting your seedlings.
[amazon table=”2553″]Soil testing methods
Soil testing becomes challenging especially in deciding the best places to collect the samples from in the whole field. Any soil sample collected should represent the whole field so you have to be cautious about which place you get your sample from if you want feasible results. If for example you take a sample from a part of the field where the yields have been plenty, then the soil representation of the whole field will show that the soil is all-good. If you do the same for a place with past average yields, the soil test results representing the whole field will be average. You therefore have to know the whole field well in order to get a true representation. The person doing the testing must take time to learn everything there is to learn about the field.
Random testing
One of the oldest methods of soil testing is random soil sampling. This however works well with a field that has almost the same strengths with very little variations in every part. Another kind of random testing is managed random sampling which requires the testing of soil samples from places within the field with average yields. This method is different from random sampling in that it gives average results for the whole field. If you are not sure of the most dominant places in the field, then managed random sampling is the best method to use.
Benchmark sampling
In benchmark sampling, less are of the field goes through the testing procedure. This method is best for fields with variability. These are hilly areas and places with potholes and uneven fields. A small part of an area representing the whole field goes through the testing procedure. The site is marked with a GPS or any other means that would make it possible or easier to come for another sampling from the same place after a few years. It is however advisable to create more than one benchmark in one field especially in cases where it is hard to identify the most dominant places. This method is also more costly than the random sampling method but it also reduces the risk of getting the wrong sample representations of the field.
Features that make using the benchmark method easier are the landscape and the colour of the soil. Comparing the colour soils with past yields will give you an estimate of what to expect. Checking on the crop development from various positions in the field can also give you an idea of which places to select your sample from for the benchmark sampling.
Benchmark method comes in very handy when identifying the different kind of fertilizers to apply in different parts of the field. Areas in the field are divided into tertiary, secondary and primary depending on the test results. The method also allows for better management of crop rotation.
How to test soil PH
Collecting soil samples for testing should also be systematic and carried out in a clean manner. The tools you use should be clean and stainless. A scoop of the top soil is the best to use for the testing. The receiving container should also be clean and stainless. After collecting the samples, mix them into a homogeneous mixture before transferring them into jars. The pre-test preparations will require the person testing to identify the sites to scoop the soil from in the field. After you finish doing this fill out a data sheet and prepare the sampling jars in readiness for the soil. This is the procedure to follow
- Using a quality soil-sample-probe, scoop on the soil you want to test
- Make sure to take samples from different locations in order to get a true representation of the whole field.
- Make sure all the soil samples are scooped from the same depth. The depth should not exceed 10 inches
- Place all your samples at a 90-degree angle to the ground. Do not put the samples at any other angle
- Use a plastic clean container to mix your soil samples and place the mixture in a well-labelled test bag. Mark the bags with the places of soil origin.
Benefits of soil testing
Many people do not take soil testing seriously but it saves on many costs and helps to produce better quality yields. This also translates to more produce. One of the things that take up most of a farms expenditure is fertiliser. If you do not use the right fertiliser for the farm, then you may get poor quality products. Soil testing helps you to choose the right fertiliser to use on the field. Without soil testing, you may end up using more fertiliser than you need and over fertilising, is costly. A soil test will save you by getting the right soil PH so that you cut down on costs by under fertilising.
- Soil testing allows you to know the exact nutrients lacking in the soil. This helps you to buy the right fertiliser with the nutrients the soil lacks. Below are all the benefits derived from soil testing
- You make better fertiliser decisions thus reducing the risks of poor yield and increasing the chances of profitability
- Soil testing shows the amount of nutrients in the soil and the exact places with the said nutrients
- It identifies all the nutrients that could help with higher produce
- Helps to monitor soil PH, OC and EC. These three are the ones responsible for the availability of nutrients to the crops, profitability and yields.
- Helps with a clear basis for VRT (Variable Rate Application
- Helps with decision making about the rate at which to use fertilisers, when to use them, where to use them and what brands and fertiliser products to use
- Helps you to learn more about the different types of soil in your field and different ways to manage the soil types for maximum yields
- Helps to maximise all your responsiveness for the in-season
Best Soil Test Kit Reviews
Below are some of the best soil PH tester kits to help with your soil sampling tests.
Luster Leaf 1605 Rapitest Digital Soil Testing Kit
[amazon box=”B00FGPLZZS” grid=”1″]The above soil test kit uses electricity and is a new version of the older 1601 soil test kit from the same company. It is also one of the best soil PH testers in the market today. The kit uses the trendiest LED GROW LIGHTS technology and an up to date modern optical calibration system to carry out the tests. The calibration of the kit is very advanced that it can read the smallest colour variations that are otherwise difficult to notice or read with the normal naked human eye. It comes with instructions that are easy to follow.
There are instructions for soil Nitrogen, PH, Phosphorous and other tests like Potash. All you need to do is slide the test kit test tube in the provided optical chamber and push all the given buttons in order to read your soil results. The kit also comes with ways to tell you how to adjust the soil PH from the results. It goes further to give you recommendations for the right fertiliser to use with those kinds of results. All this information, you get from the booklet that comes with the kit. Just go to your test results, compare them with the various PH possible results on the booklet, and adjust your soil PH accordingly.
Pros
- The soil PH tester comes with an easy to follow booklet
- Anyone can use the kit after following the instructions clearly
- Comes with DIY instructions on how to act on the results
- Allows you to know how to adjust your soil PH from the findings of the test
- Has a preference of crop management for over 450 plants
- Advises on the best fertilisers to use according to the soil test results
- Results come out within seconds
- One of the best home test kits in the market
- Affordable
- Can perform 25 tests, which includes 10 for soil PH and 5 each for Potash, Phosphorous and Nitrogen
- Uses very advanced technology
Cons
- May be confusing for first time users who do not know how to interpret the results
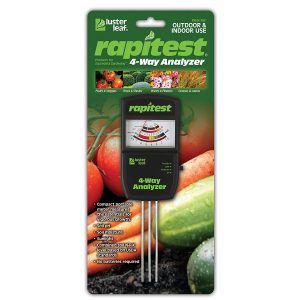
Luster Leaf Products – Rapitest 1880 Electronic 4-way Analyser
Another soil tester from the Luster family that is great for home soil testing. It is good for testing soil PH, Sunlight, Moisture and Soil fertility. Features 4 premium meters all wrapped up in one multi-purpose soil tester. You can monitor the following things with this soil testing kit; PH, Potash, Phosphorous, and light quantity and total Combined Nitrogen. The kit comes with extensive instructions that guide you through every step. The booklet just like its other Luster counterparts, gives you recommendations after the test results are out. Maintenance of the kit is also very easy as it comes with a cleaning pad. The kit does not use any batteries.
Manufactured in the USA, the kit helps all the farmers that use it to manage the soil PH of their soils for better yield and to know their choice of fertiliser for better yields. Anyone can read and interpret the results after following the simply laud down instruction. It is affordable and readily available.
Pros
- Gives recommendations on how to control the soil PH after the testing
- Helps in following up on other soil factors like the amount of moisture, sunlight, and nutrients in the soil
- Helps in determining the best fertilisers to use for the soil to avoid over fertilising
- Easy to follow
- Comes with a cleaning pad
- Comes with an extensively written booklet
- Affordable
- Does not require any batteries
Cons
- Results may be confusing for first time users
Soil Savvy
[amazon box=”B01GIMOG8A” grid=”1″]If you are not sure what your garden or lawn needs to make them better or what fertilisers to use, then you need to test the soil by using a simplified soil test kit. The kit to use for this task is soil savvy, as anyone can use it. It is very easy to understand and it is ready-to-use so you will not have to struggle looking for extra gadgets. It gives you a systematic guideline on how to test your soil and after that, it gives you recommendations for the right fertilisers to use depending on the test results. The price of the kit includes the price of the analysis too and the price of the full report of the test. It tests among other things, the soil PH, the Nitrogen, Photos and Phosphorous in the soil.
After carrying out the tests, you send the sample to the company and they email you back the results in 7 to 10 days. The report gives a personalised analysis on all the nutrients in the soil, and the PH level. The nutrients that the company analysis from your soil sample are potassium, calcium, sulphur, iron, sodium, manganese, aluminium, boron, copper, zinc and Phosphorous. The report also comes with recommendations for the fertiliser that best suits your soil.
Soil savvy goes beyond what other test kits do and gives you the precise fertiliser that best suits your soil. Not many others can be that precise. With the information given on the report, it makes it very easy for you to carry out effective fertiliser management. Manufactured by UNIBEST International, soil savvy has been in the market for many years and many farmers have benefitted from its effective analysis of the soil.
Pros
- Highly advanced fertiliser management skills from the soil test report
- Easy to read and follow instructions
- Very simplified soil testing techniques
- Analysis goes further to break down many other nutrients in the soil
- Helps to prevent over fertilising of the soil
- Method of testing is very accurate
- Great customer care responses are very fast
- Results come back within a week
Cons
- As compared to other soil testing kits, this one is pricey. However, this is because the price of shipping and analysing the results are all-inclusive.
- Some people prefer instant results so the wait may not go well with everyone.
Luster Leaf 1601 Rapitest Soil Test Kit
[amazon box=”B0000DI845″ grid=”1″]For good and healthy growth of all plants, need nutrients. The nutrients needed by plants mostly are Potash, Phosphorous and Nitrogen. Just like human beings need vitamins and proteins for better growth, so do plants need these nutrients. Many farmers are familiar with testing skills designed as capsule systems and colour comparators. They are easy to use and give very fast results. For anyone new to the technology, you do not have to worry because it comes with self-explanatory guidelines and it is easy to catch up.
This tester uses colour codes and comes with a comparator film together with capsules that make testing easier and more understandable. The instructions are simple and all you need to do is take a sample of soil from your garden, mix the sample with water and transfer the mixture to the available colour comparator. After that, you add some powder into the provided capsule, shake the mixture thoroughly and sit back to watch the colours develop.
Once the capsule finishes developing the colours, note the colour and compare the results with the results on the booklet. There is an explanation of every colour. Once you match your colour to the results, then you will have the problems with your soil explained.
It is advisable to rest your soil periodically using this kit throughout the growing season of your plants. It is even more advisable to carry out a thorough test just before the planting season, during the spring period and during the fall when you are preparing your beds for new crops.
The kit comes with 4 colour comparators and drops for easier transfer of the solution. Accompanying this are 40 test capsules and a complete booklet with well-explained guidelines. The 40 capsules are 10 for each of the three nutrients and PH level. The preference list of the PH caters for more than 450 plants.
Pros
- One of the fastest DIY home test kits
- Easy to read and understand
- Easy to implement
- Very innovative ways of using the capsule and colour comparator methods
- Affordable
- Has all the components you need for 40 tests
- Very trendy
SSAWasa
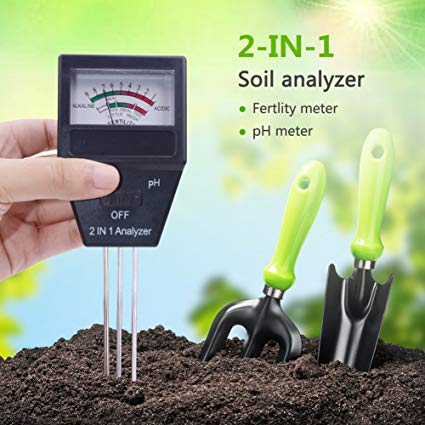
[amazon box=”B01E3G5ONE” grid=”1″]The above is a soil tester that helps you to manage your plants for better yields. The 3-in-1 soil meter allows you to know and take care of your plants better than you did before. With this kit, you will know when you should water your plants, and when you should let the plants dry out. If you have been over watering your plants in the past, this kit shows you how and when to stop.
Besides helping you with watering and drying out your plants, it also helps you to know the PH level in the soil. Even though both alkaline and acidic components are good for the balance of the soil, you need it in correct controls otherwise too much or too little can be damaging to the soil. When you plant your plants on a highly alkaline soil structure, most definitely, they do not grow well. You need this kit to help you in keeping the right soil acidic and alkaline balance.
The instructions are very clear, easy to read and just as easy to follow. The booklet goes further to give you proper instructions on how to handle the probe when you are drawing soil and how to clean the testing kit. Some of the instructions advise you not to insert the probe into the soil for a long period and not to use the devise to test anything else but soil. The 3-in-1 components of the tester are
- Moisture meter, which allows to know when your plants need water and when they need drying out
- PH Tester, which helps you to control the level of PH in the soil
- Sunlight gauge which helps you know when and if your plants are getting enough sunlight
Pros
- It is a 3-in-1 tester, which makes it convenient when it comes to knowing about other soil factors besides the PH
- Easy to use
- Uses no batteries
- Affordable
- Anyone can use it
- It is good for both indoors and outdoors farming
Conclusion
The kind of farming methods today and the hybrids used in farms remove very many useful nutrients from the soil. They are also the main reasons why farms GROW WEEDS that are harmful to the soil. This requires many people to keep a close monitor on the kind of soil they are using to plant their seedlings. Weakened soil will produce minimal and poor quality yields.
You need to know the profile of your soil before you plant anything. The above-mentioned soil PH testing kits will help you regain the fertility of your soil. They are simple to use and very affordable. You do not even need a specialist to use them. Take full control of your farm today by learning of all the different ways you can keep it fertile and ready for good quality plants. Get testing today.
Best Article About Marijuana Grow Kits On 02- 2026
- Micro Grow Box
- Best Insect Fogger
- Propagation Kit
- Setup A Low Budget Grow Room
- Grow Box for Beginners
- Best Soil For Weed
- Nova Decarboxylator
- Best Reflective Material
- Click and Grow Smart Garden
- Aerogarden Reviews
- Grow Room Cost Calculator
- AcuRite Thermometer
- Clonex Rooting Gel
- Bubble Bags
- Grow Tent Kits
- Tom’s Tumbler TTT 1900 Dry Trimmer
- Cloning Gel
- Marijuana Microscope

