It is extremely vital for every stoner to know how to roll a joint. Actually, the assumption is if you are a stoner, then you definitely know how to roll a joint. On the contrary, many WEED stoners do not know how to do it and when they do, it is all wrong. The cannabis community today has more ways of rolling up their joints some of which are too hard to comprehend especially for beginners.
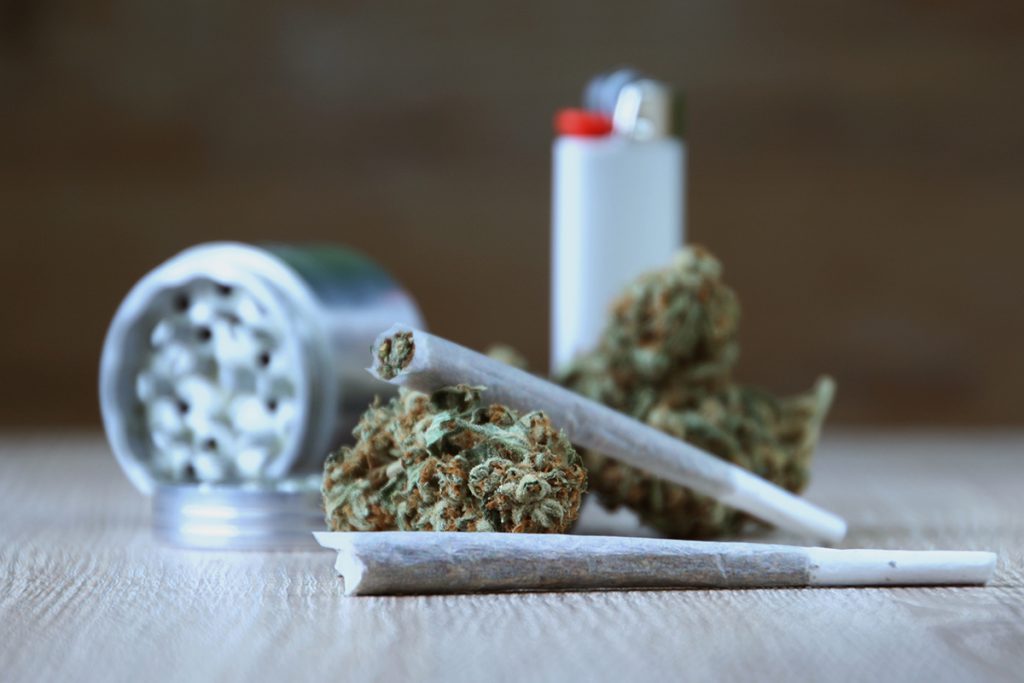
Joints today come in the shapes of favourite cartoon characters, superheroes and many more. If you are a beginner and trying out rolling skills, you do not have to go with the trends. You need to learn from the basics and in this article, I will give you a guideline on how to roll a joint like a pro.

[su_button
url=”https://www.grasscity.com/?ref=bowdenmary” target=”blank” rel=”nofollow” background=”#5369f5″ size=”6″ icon=”icon: hand-o-right” icon_color=”#FF0000″]Check More Product Here[/su_button]
Best Article About Marijuana Fact On 07- 2026
[su_note note_color=”#f1fcdb” text_color=”#0d100c;”]
- How Long Does Nicotine Stay In Your System
- How to Clean a Bong
- How to Decarb Weed
- How Much Nicotine is in a Cigarette
- How to Quit Smoking Weed
- Benefits of Weed
- How to Pass a Drug Test
- Why Does My Vape Taste Burnt
- Indica vs Sativa
- Is Weed Legal In California
- Marijuana Affiliate Programs
- How to Make Pot Brownies
- How Many Grams Are In An Ounce Of Weed
- How to Make Cannabutter
- What Is Rick Simpson Oil
- How to Roll a Blunt
- How Long Does Marijuana Stay In Your System
[/su_note]
Best Rolling Machine On Amazon:
[amazon bestseller=”rolling machine”]
Why smoke a joint and how do you prepare it.
The first question you should probably ask yourself before learning the steps is why you should smoke a joint. The best answer for this is smoking CANNABIS is the best way to feel its effects whether you are smoking it for medical benefits or you just want to feel high. For you to get a good smoke out of your weed, the joint must be easy to smoke and therefore comes the reason for proper rolling.
You however do not just up and start rolling but there are things to put into consideration first. The major one is getting your weed ready for rolling and the particular items you need for the task. Not much goes into getting ready for rolling because all you need are just two simple things. Weed, paper, and you are good to go.
Even though there is not much you need for rolling, you still need to prepare your weed for rolling. People use different ways to prepare their weed for rolling; some use grinders to break up the buds because using fingers to do the same will not give the expected product. Also using finders to break the buds destroys the trichomes, which are the most essential parts of the buds.
When using a grinder, you also have to be careful not to grind the buds too finely in order to avoid resin. Having resin on your ground buds may lead to the joint becoming hard to hit. Now that you have a grinder, the next thing to make sure you have is a joint paper. You could also need a rolling tray to make your work easier.
In some instances, you may be in a situation where you have absolutely nothing to roll your weed with in the form of a real joint paper. this should not worry you because once that craving strikes, you will have to take care of it. You can make a homemade bong or turn an ordinary paper into your roll.
You however have to note that real joint papers are the best to use for your weed. Printer papers, gum wrappers without the aluminium peel end off or even cornhusks can all play the part but they are the best to use. You can only use them if you have no other alternative and maybe only once as you prepare to look for authentic joint rolling papers.
[amazon box=”B06XS9L2P4″ grid=”1″]
Guidelines on how to roll a joint
In this section, we will give a step-by-step guideline on how to perfect your joint rolling skills. These are the traditional ways of rolling a joint with no tricks or any fancy equipment.
Step One
Breaking down the buds

The first thing to learn is how to break your buds into a smoke able consistency. Some people, very few I might add smoke their weed without using pipes or papers but I can assure you that this is very dangerous as it takes a toll on the lungs. Preparing the weed makes it easier to smoke and with better effects.
As I said earlier, at this stage, you can prepare your weed to a good consistency using a good grinder. For one of the best grinders you can use for this step, check out the product review details below.
Best grinder product review.
Space Case Grinder
[amazon box=”B004G3RIRK” grid=”1″]
Space grinders are some of the best products to use for grinding your buds. The product that many people have tried to imitate but never managed to duplicate is a worthy quality product that will last you a lifetime. It features grinding teeth that do not dull your weed and a screen that does not clog. The grinder has a neodymium magnet that holds it in place throughout the grinding process.
The benefit of using this grinder is that you can grind more weed buds all at once which saves you time. The USA made product grinds the weed to the perfect consistency and it requires very little maintenance. It is easy to clean and one of those investments you will never regret buying.
[su_note note_color=”#f1fcdb” text_color=”#0d100c;”]Best Electric Weed Grinder – Electric Herb Grinder Pen Dispenser Review[/su_note]
Step Two
Prepare a filter
Using a filter is optional and many weed smokers prefer not to use it. The main aim of a filter is to prevent loose weed form getting into your mouth as you smoke. It also prevents resin from getting into the mouthpiece and burning your fingers. The reason why some people do not like using filters is because they bring out the taste of paper, which becomes more prevalent as you continue smoking. This dilutes the real taste of weed.
If you choose to use a filter, take a piece of it and fold one end into the W shape. Then take another filter paper and roll it tightly around the W shape making sure there are no gaps in between. Note that you can have whatever shape you want and not necessary the W shape. If you choose to skip this step, then go direct to the next one.
Step Three
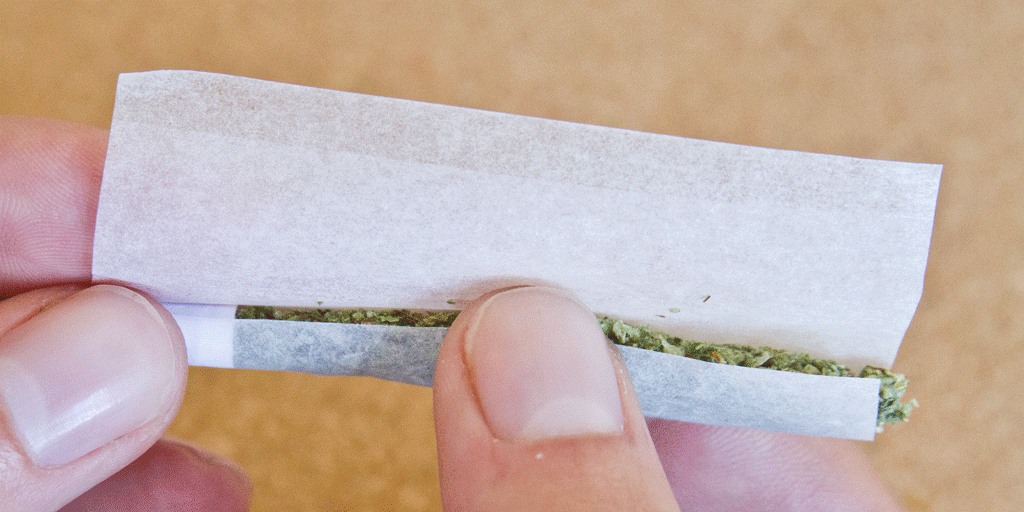
Place your weed on paper
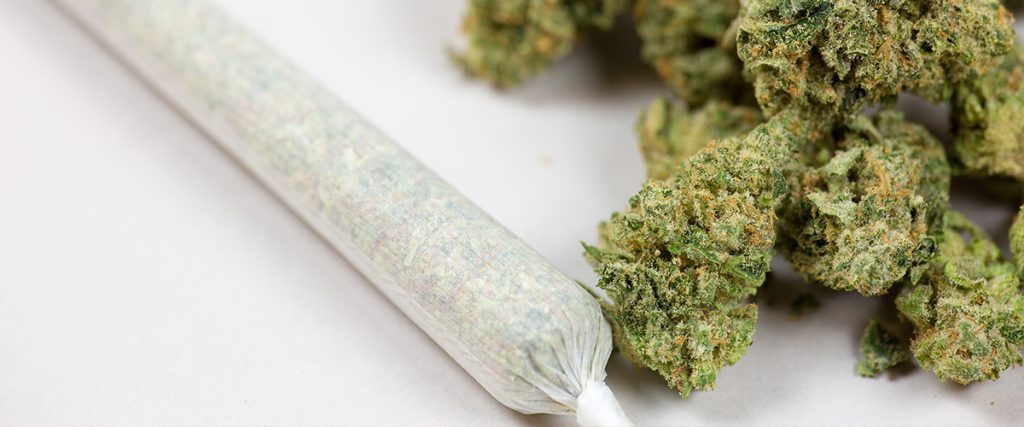
The paper is everything when it comes to rolling up a joint. If you choose not to use a filter, then it is fine but if you want to go with the filter, select one side for it on your rolling paper before placing the weed. In many cases, there are two styles to roll up your joint. One is the pinner and the other is the bat. Before putting your weed, you must first make a decision on the style you want to use.
A pinner looks just like a cigarrete while bats have the shape of a cone with one end being much larger than the other end. Many people prefer the pinner because you get an even hit all throughout the puff. Solo smokers prefer the bat style because all they want are the first few puffs to feel a high. The more they continue smoking, the less weed they smoke and they can choose to either smoke to the end or toss the remaining part away.
After deciding the style to go with, sprinkle your weed into the joint making an even spread if you are using the pinner style. If you go with the bat style, sprinkle less weed at the filter end and increase the amount as you move from the end. Once you are through with this, you can now start shaping your joint.
All you need for shaping the joint are your thumbs and forefingers. Roll the non-sticky part up and down slowly until your joint takes the shape you desire. After this make the joint tighter ensuring that, there are no gaps in between.
Step Four
Tucking in your joint
For some people, this step is a bit tricky and it needs mastering. For a good tuck, start at the end of the filter, slowly tucking the paper around the weed and move your thumb to the other side to tuck in the rest of the weed.
Step Five
Rolling and licking
After you are certain that your tuck looks okay, roll your joint until the glue end of the filter. Once you are here, apply some moisture on the glue area and slowly, pat it down on one side. Continue gluing in the rest of joint until you are sure you have left nothing unsealed.
At this point, you can light up your weed but you still need to be sure that you are getting the best out of your roll. Ensure that the roll is tight and before lighting it up, push in the weed from the end of your filter. You can use anything with a small blunt tip to help you achieve the perfect push.
When you are pushing the weed down, ensure that it fills all the gaps in the joint by pushing it all in closer together. Also, make sure that you leave some space for airflow by not packing in down too much weed. If you put too much, your joint will just burn and you may have nothing to smoke even if you take in huge pulls.
Step Six
Twisting and lighting
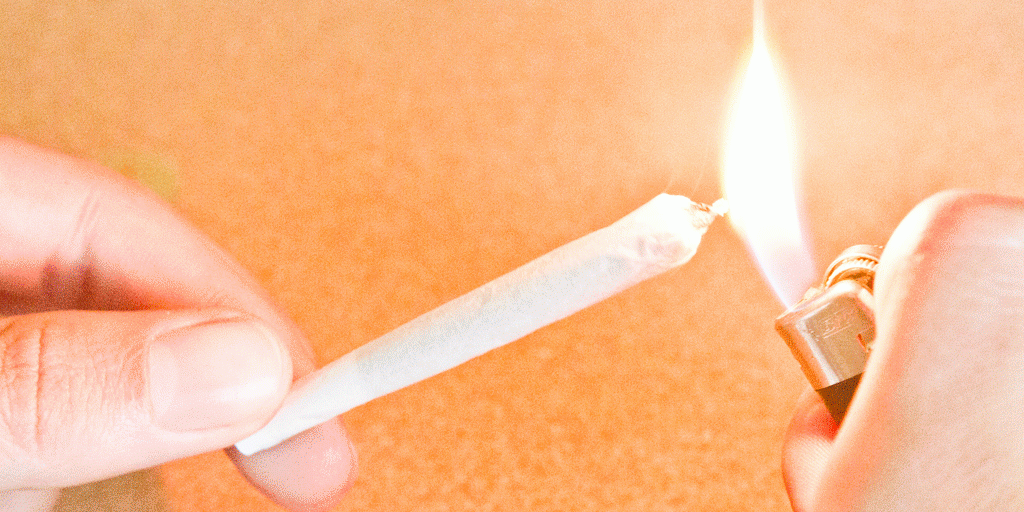
Here comes the final step of your joint rolling. The twisting and lighting part will depend on whether you are rolling your joint to smoke right away or rolling it o smoke later. If you are planning to save it for a later date, then you will need to shut the end of your joint. This you can only do by twisting.
If you look at your joint after you finish rolling, you will notice that the opposite of the filter is only paper with no weed. To make sure you keep the weed inside the joint safe and fresh, put a little moisture on the end of the filter and twist the paper shut. If you are not saving it for later, just go ahead, light up your joint and enjoy the high.
Read Next: Best Rolling Papers For Joints
How to roll a cross joint
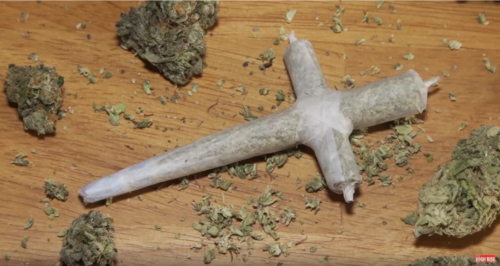
As I mentioned in the beginning, today, there are many other kinds of joints besides the regular cigarette looking and coned looking joints. People today, especially celebrities are rolling cross-joints and making them loo cooler than the regular joints. Cross-joints are just fun ways to enjoy your weed smoking with a little class and style. If you want to venture into making cross-joints, here is a simple guideline on how to do it. Note that the word may fool you but it is just as easy as rolling a regular joint.
Requirements:
What you need for this method are your favourite weed blends, a needle or paper clip or any other pointed object and three rolling papers.
Step One
Choose your weed blends
For cross joint rolling, you need to have just more than one weed strain. Choose the strains that you like most and make two rolls of them. The first roll should be slightly longer than your normal regular roll and the second one should be thinner and much smaller. Make sure to leave the ends of both the small and the larger rolls empty to facilitate better ignition of both joints.
Step Two
Make hole through the joints
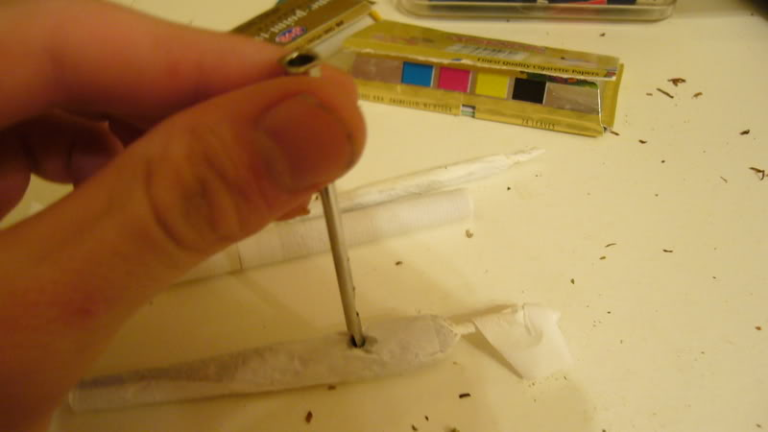
Once you have rolled up your joints, use your needle or paper clip to make a hole through to the larger hole. The hole should be three quarters from the base of the joint and you should make sure that your pierce through from one side to the other. Do the same with the smaller joint but instead of having it three quarters away from the base, make sure it as the centre of the joint.
The hole on the larger joint should be slightly larger than that of the smaller joint. The importance of these holes is to allow the flow of air from the tip to the end and this step is the most important when making a cross joint because without it, then your joints will only burn and you may not have any smoke to inhale.
Step Three
Insert the smaller joint into the larger joints hole making sure that you align both holes. If it is your first time doing this, ensure that the smaller joint is as small as possible to get it right the first time.
Step Four
Now the joints will take the shape of a cross and the next step will be to wrap them up. To do this rip a strip of the remaining rolling paper and wrap the center of the cross. Seal them completely ensuring that you do not leave any gaps in between to prevent smoke from seeping out. Wrap the paper diagonally to ensure that both joints are securely in place.
Step Five
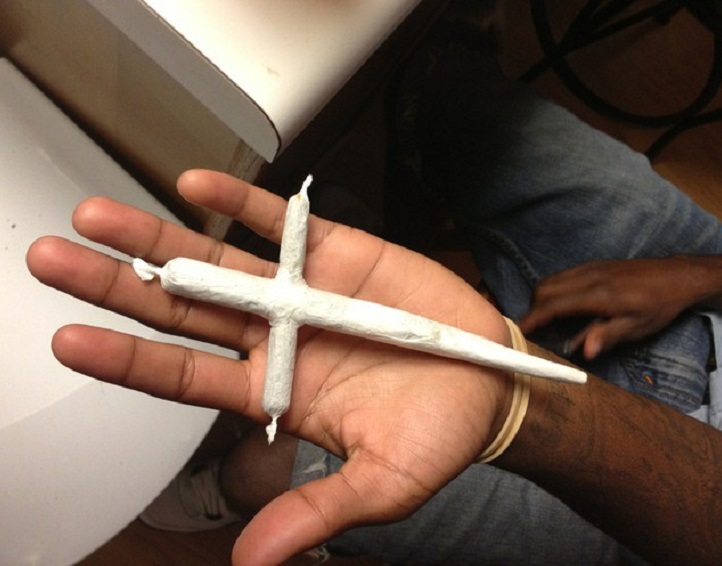
Now that you are sure your cross joint is securely wrapped, sit back, light up and enjoy a mixture of your favourite weed blends.
Though the making of cross-joints may seem hard for most people, all you need is enough practices and you will get it right. It is also another way of bringing inventive ways of enjoying your weed and moving away from the traditional regular joint smoking.
How to roll joint using rollers
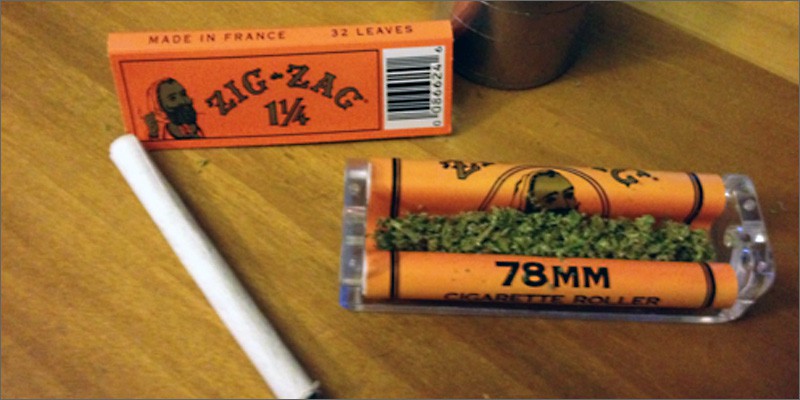
Besides using your fingers to roll a joint, one of the other easiest ways to do it is by using a roller. Follow the same grinding instructions and once you have the correct twist from your buds, take the roller making sure that that it is not in a tight position. Take the roller apron down and fill the roller chamber with the bud.
Distribute the bud evenly in the chamber, if you are using a filter, place it on either end of the roller. Close the roller and in case you have any bud sticking out that may prevent complete closure, push it in with your finger. Do not overcrowd the roller to prevent the joint from becoming too tight to smoke.
Without using any paper, roll the roller until you are sure the bud is in place. With the adhesive facing up, take a joint paper and place it in the roller opening. After this, roll down to ensure that the adhesive stays on the right end.
Roll lightly to avoid the joint from becoming too tight. Continue rolling lightly and solely until only the adhesive side of the roll paper is sticking out. Lick the glue on the adhesive and continue rolling to finish the task.
Once you are done, you can now take your joint out of the roller and enjoy a smoke. You also have to note that joints rolled with a roller have a finer looking look than those rolled by thumbs and fingers. Then again, this is a machine and those are human fingers.
Using a dollar bill to roll a joint
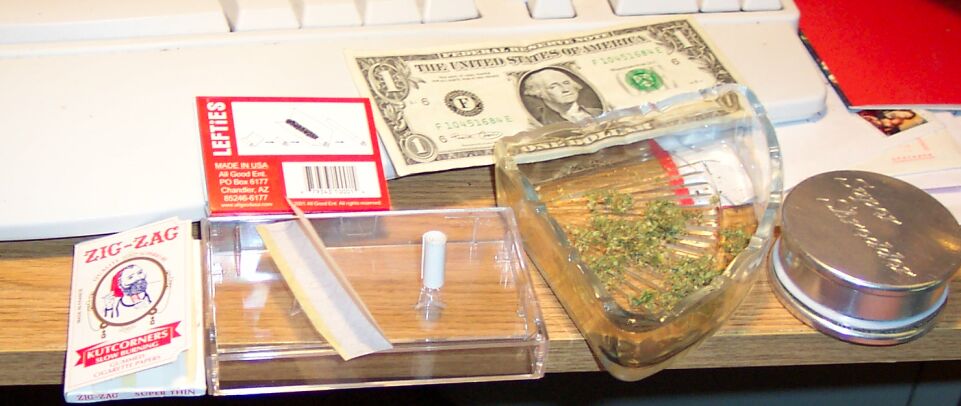
In some circumstances, you may have seen people using the dollar bill to roll their joints. It is important to note that the dollar bills just act as makeshift rollers but not smoking papers. To start you need weed, a joint paper and a dollar bill.
Take your dollar bill and fold it into half, in the middle spread your bud evenly. Fold the dollar bill back ensuring that your cannabis stays in place in the middle of the folded crease. Use your thumbs to move your buds to the bottom of the crease by rolling the dollar bill back and forth slowly.
Continue rolling the dollar bill until you reach the end covering your weed. Hold your dollar bill with one hand and place your joint paper on the opening of the dollar bill making sure the adhesive part of the paper faces you. Lick the adhesive to close in the weed and start rolling the dollar bill back up again.
Be gentle and ensure that you do not roll the joint too tight to prevent the joint from becoming unsmokeable. Roll the dollar up completely, take out your joint and light up to enjoy your weed.
How to roll oil joint
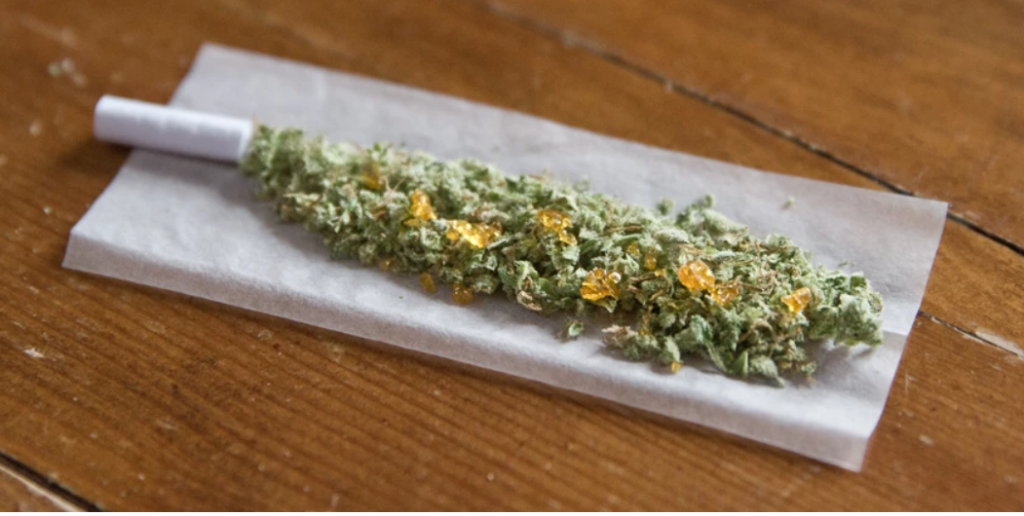
Some people especially those that have smoked weed for long want to spice up their cannabis by adding something extra for super high effects. Weed with oil also tastes surprisingly good. If you want to go down that route, here is how you should roll your oil joint.
Get your favourite strain, your favourite oil that should also be high quality for better effects, your joint papers and a dabbing tool in order. Using the dabbing tool, take your oil and spread it evenly on the joint paper allowing some space for your finger. After that take your preferred cannabis strain and sprinkle it on top of the oil.
Make sure to spread contents are evenly and continue to roll your joint just as you would roll a regular joint. After you are through with rolling, tuck in the contents carefully. Rolling oil with cannabis is a bit tricky so you have to be extra careful. If you have any weed at the ends, use a tool to push it back in slowly and after, that twist the ends, light up and enjoy a new feel from your weed. The best oil to use for rolling with your weed is hash oil.
Read Next: Seed Banks That Ship to the USA

[su_button
url=”https://shop.ilovegrowingmarijuana.com/collections/all?aff=4083″ target=”blank” rel=”nofollow” background=”#008000″ size=”6″ icon=”icon: hand-o-right” icon_color=”#ffffff”]BUY MARIJUANA SEED HERE[/su_button]
Choosing the best rolling papers
Choosing the right paper for your rolls may be the most important thing to determine the look and taste of your joint. You will find many different kinds of joint papers in the market all made from different materials. If you are a newbie, do not rush into buying the first product that you come across. Read reviews, and ask those that know more about them in order to ensure that you do your rolling perfectly.
Some of the best joint papers are the eco high quality papers that have few or no contaminants. Some papers also come with flavours to add an extra taste to your weed. The downside of using the flavoured papers is that they may contain some dyes, toxins and bleaches, which are not good for both your health and the environment. The recommendation would be to use them sparingly or for as few times as you possibly could.
Choose a paper that does not have a bad taste and one that burns evenly. For even burning, many people choose thin papers. to protect your papers when travelling or moving around, you can buy a rolling paper protector. a protector is also good because it prevents the papers from bending.
Best Rolling Papers On Amazon:
[amazon bestseller=”best rolling papers”]
Wrapping it up
Now that you know everything you need to know about rolling a joint, you can go ahead and enjoy your weed in comfort. It is important though to note that sometimes it takes much practise to get it right. Once you perfect the art, then you will have no regrets for trying many times and failing. Practising to do it right is also fun and the most natural thing to do.
We hope the article was of help to you and you will gladly share it with anyone looking for guidelines to roll up a joint. If you have any comments or questions, you can get in touch with us and we will respond.
Read Next: Best Cigarette Rolling Machine Reviews
More from my site
![OG Kush Marijuana Strain Review [Everything You Need to Know]](https://101growlights.com/wp-content/uploads/2019/08/OG-Kush-150x150.jpg)


![Best Cigar Lighter For Smoking Cigars [2021 Reviews]](https://101growlights.com/wp-content/uploads/2019/09/Best-Cigar-Lighter-150x150.jpg)


Very nice and informative guide.
I, as a seasoned roller, find it quite relatable.